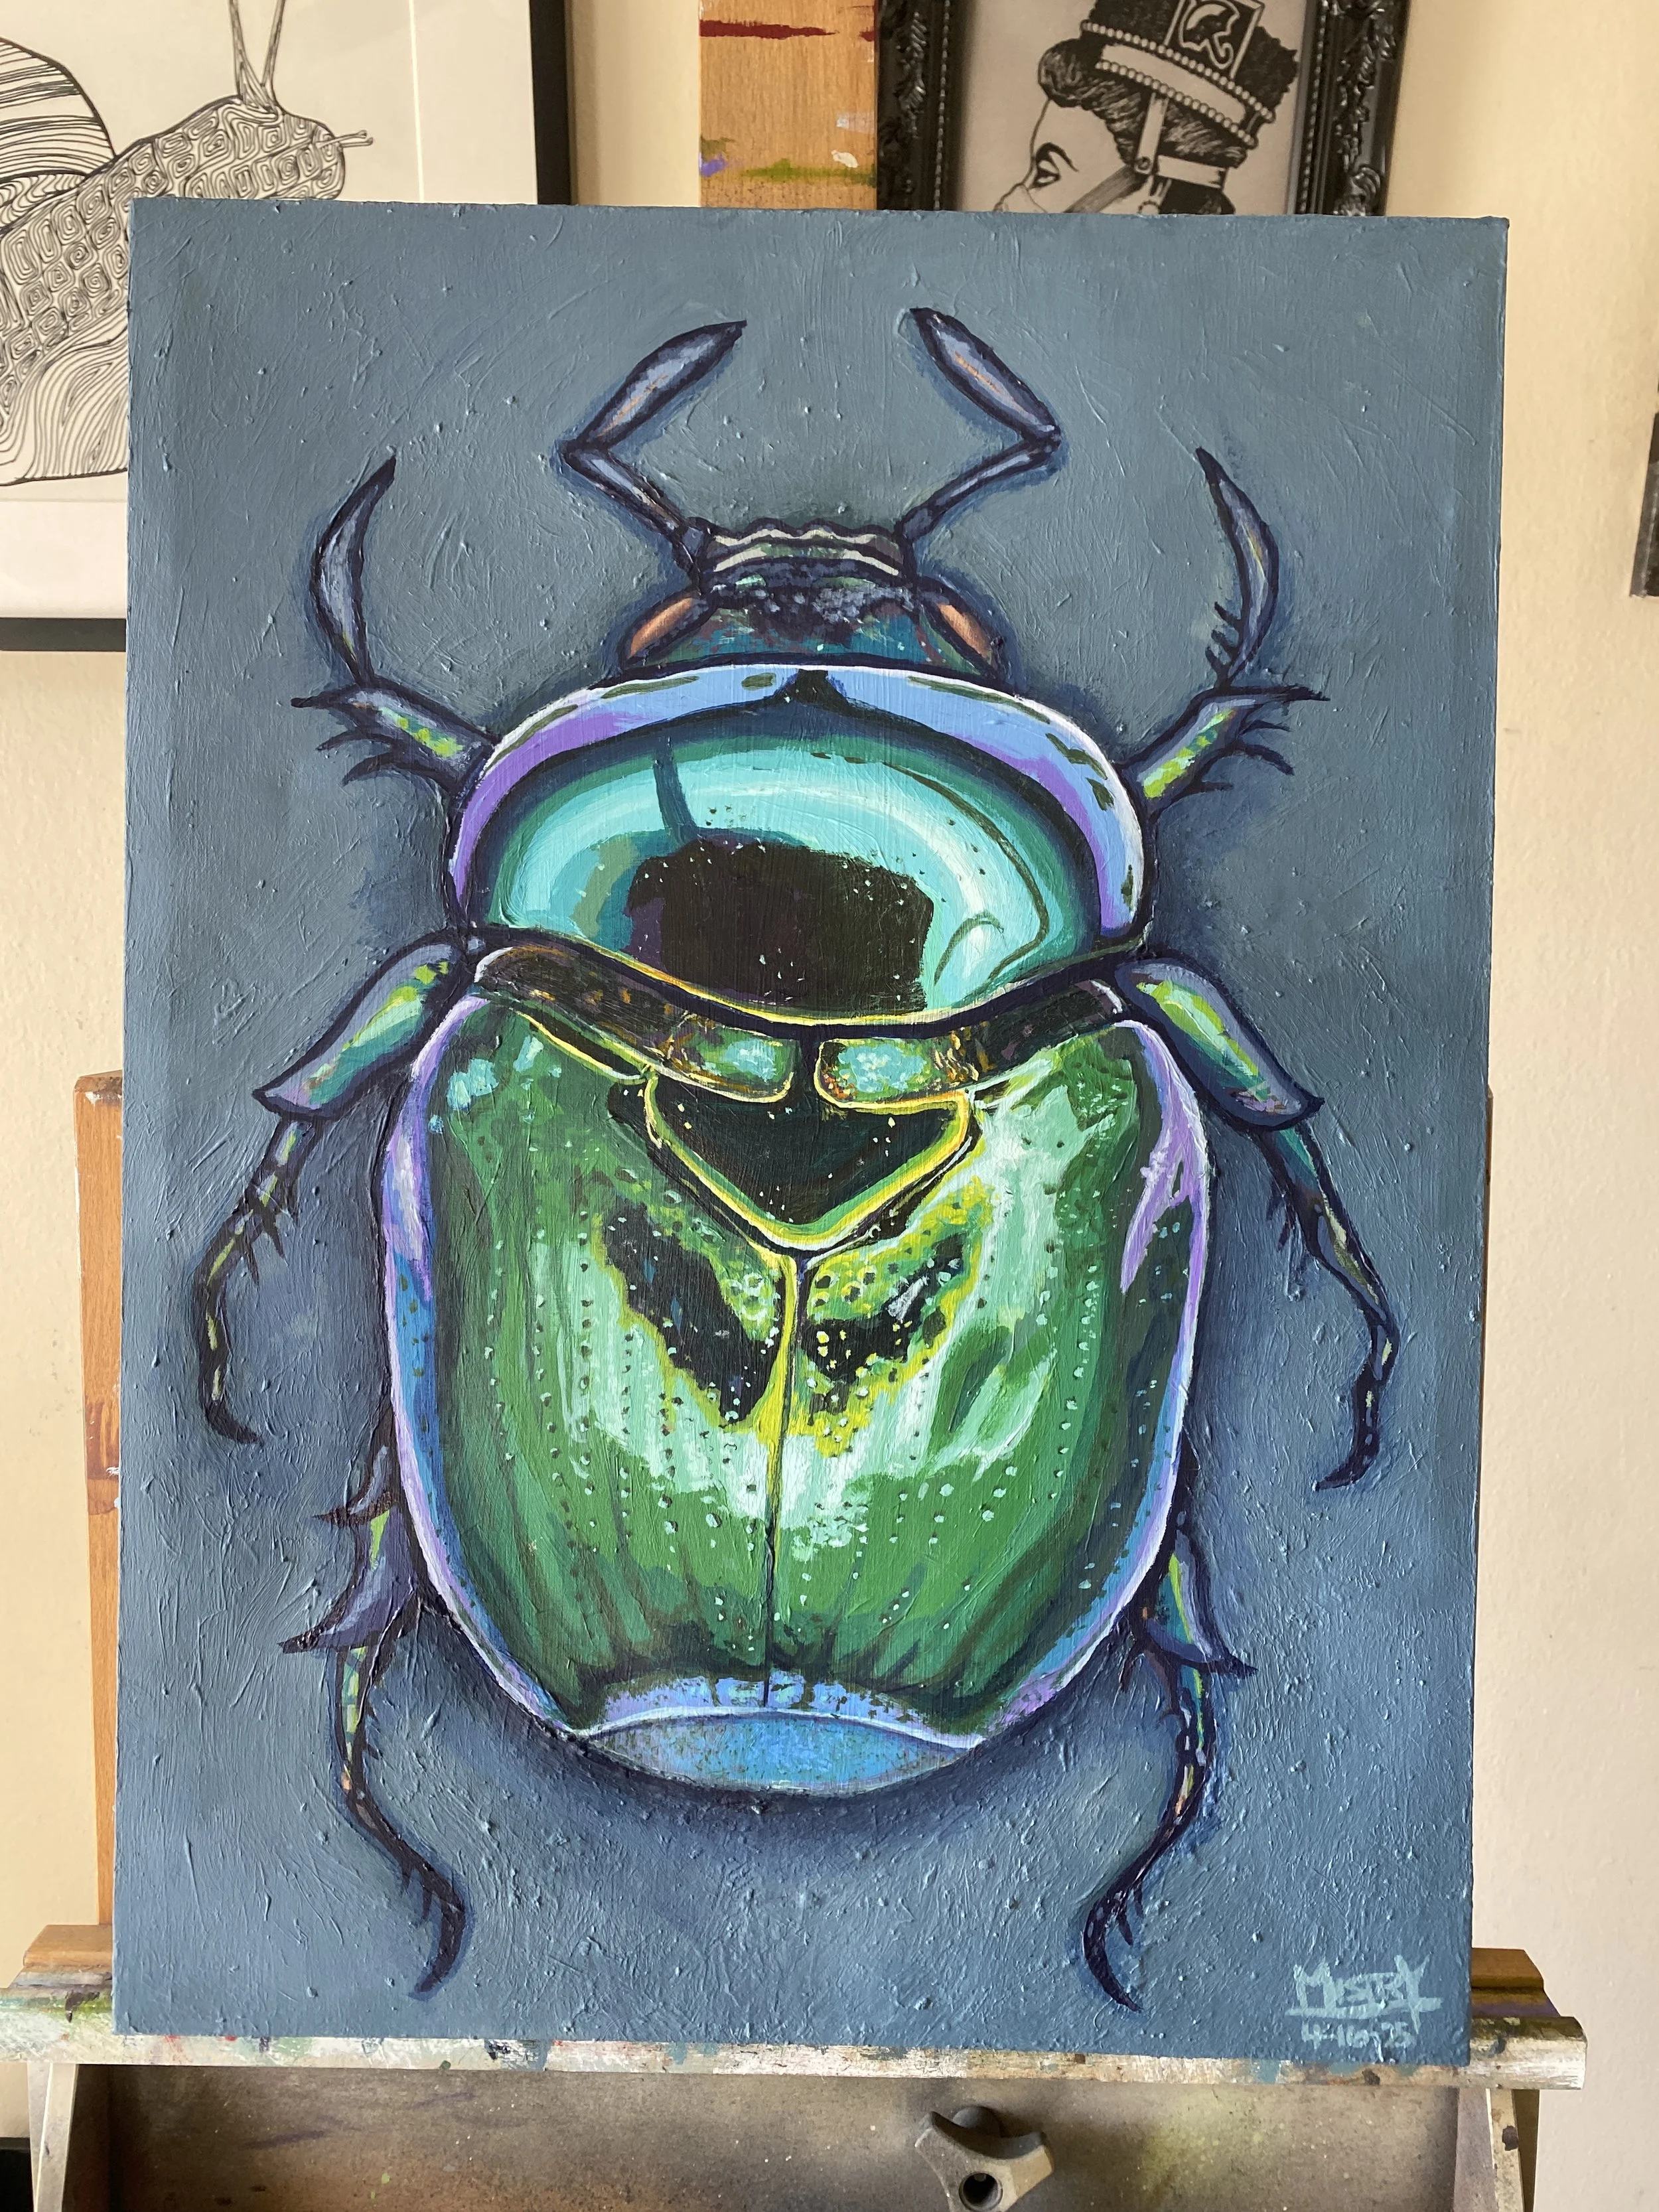
Some 3D prints


Since the first Prusa nameplate print, I’ve been dabbling in a lot experiments. There has been a lot of headache, tweaking and failures.
Through these experiences, I’m now more comfortable using my Prusa MK3S+.

I bought and tested a variety of different filaments. I experimented with both PLA and PETG.


The Lucky 13 model was a bit tricky. It required more precision to print the smaller parts and make them fit to form a posable action figure.
I learned that PETG is a better material, due to its flexibility vs the brittleness of PLA.


After figuring out the smaller Lucky13 figure, I decided to print a larger version. The larger version was very successful, with the parts fitting together correctly and feeling robust. I think it may have taken around 4 days to print out all the parts.


My Prusa Mk3S+


Around March 2022, I decided to finally assemble my Prusa 3D printer kit. It was definitely a very thorough process!


The kit was divided into a few boxes and helpful instructions. It even came with a packet of gummi bears.


The assembly process was thorough, but not too difficult. I would say it took around 10-15 hours to complete. First, the frame was assembled, then the bed assembly. The two Z-axis motor/screw assemblies were installed, then the sliding hotend extruder, control board, and wiring.


It was very satisfying to see the 3D printer assembled. After all this work, will it work?


It didn’t work after it was assembled. I wasn’t sure what was going on, but Prusa tech support was very helpful.
They asked to see the video of the printer in action, as well as some photos of the wiring to the PC board.


It turned out the Z axis wiring harness was in the wrong plug. After the wiring was corrected, the Z axis movement worked more smoothly.


After going through some alignment checks, I finally got the printer to work.


The first print was misaligned. After some belt tweaking, I did get it to work. Even after this print, I have ran into issues, but learned to overcome them.
3D printing is definitely a learning experience through a lot of trial and error. It’s still very satisfying to see something on the screen turn into reality.


A mosaic in Irvine


My parents had a rental property in Irvine, and I moved there with my cousin temporarily until I found a full time position. The condo had a nice backyard, but the grill area was unfinished. I thought it would be a nice opportunity to liven up this unfinished area with a mosaic.


I did some quick mockups in photoshop. One idea was to convey sky and grass, the other idea was a more basic blue.


I started the process by replacing the rotten plywood with fresh sheets. Then I used cement board as a mounting surface for the tiles. I did some research and found a great place in San Diego that sold broken tile in some very nice colors. Navy blue looked very sharp.


The installation process was fun, but a little challenging. It involved quickset cement, and being able fit tiles in appropriate places.
I did have to modify some tiles to make it the right size.


After the tiles were put up, grout was added. Once the grout dried, it was scrubbed away to reveal the mosaic design.


A few weeks after the mosaic was installed, the Irvine HOA notified me about some upcoming updates to the property. They told me that this mosaic was interfering with their updates. The HOA is difficult to deal with, so I complied and had to take the mosaic down. I was a little upset at first, but I did try something new,
and learned a new skill that I’ll apply in the future.


A floor mural for 5 3 Gallery in Laguna Beach


With the pandemic, work was slow and I wasn’t able to afford to live in Austin. Around January 2021, I moved to Southern California and stayed with my brother until I found a more stable position. I made some new friends, and one of them operated an art gallery in Laguna Beach called 5 3 Gallery. The owner, Brigitte wanted to throw a Valentines Day party and she asked me if I could help with creating a floor mural.

I was new to the area and wanted to get some exposure, so I agreed to help out. She had a sponsorship with a paint company that made environmentally friendly paints, but the color palette was limited. With the basic browns, greens and pinks, I decided to paint a walkway of henna patterns with leaves and hearts. I didn’t have any exact plans, but rather I decided to sketch with paint. The overall result was great, but temporary, considering the changing needs of the gallery. Either way, it was a great experience.


A commission for my friend Andrew


Around December of 2020, the pandemic was kicking off. With the quarantine, I had a lot of time on my hands and was free to take commissions. My friend Andrew reached out to me for a portrait. Initially he wanted a painting of Kramer from Seinfeld, but we settled upon a portrait of him as Ron Burgundy. This painting has gone through some interesting evolution, but the final result turned out great. It was a great exercise in skin tones and I loved honing in the details.


This painting has gone through some interesting evolution. The original idea was to have Andrew against a green leafy background. The backdrop then changed to a “purple 4” from one of the pictures he sent as a reference. I had some struggle with painting skin tone, but my friends gave me some great advice.