
DELL WYSE 5070

In May 2012, Dell acquired Wyse, a company that specializes in thin client computing. Wyse wished to create
a new, low powered thin client computer. This new design is fan-less and comes in two form factors.
A micro form factor and a wider version that can accommodate legacy ports and an additional graphics card.
At Dell, I was the lead designer for the Wyse 5070 and its accessories.

A thin client computer is a low powered computer that uses flash memory, rather than a dedicated hard drive.
Applications and data are stored on a central server, rather than the computer itself. Many companies use thin clients for its size, security and value.
You may find these computers within the healthcare, banking, education and commercial industries.

The top three manufacturers of Micro Form Factor PCs are Dell, Lenovo and HP. The Wyse 5070 is meant to be a middle range computer
that is more affordable than the OptiPlex 5060 MFF. The Wyse 3040 is a smaller, entry level model with less capabilities.
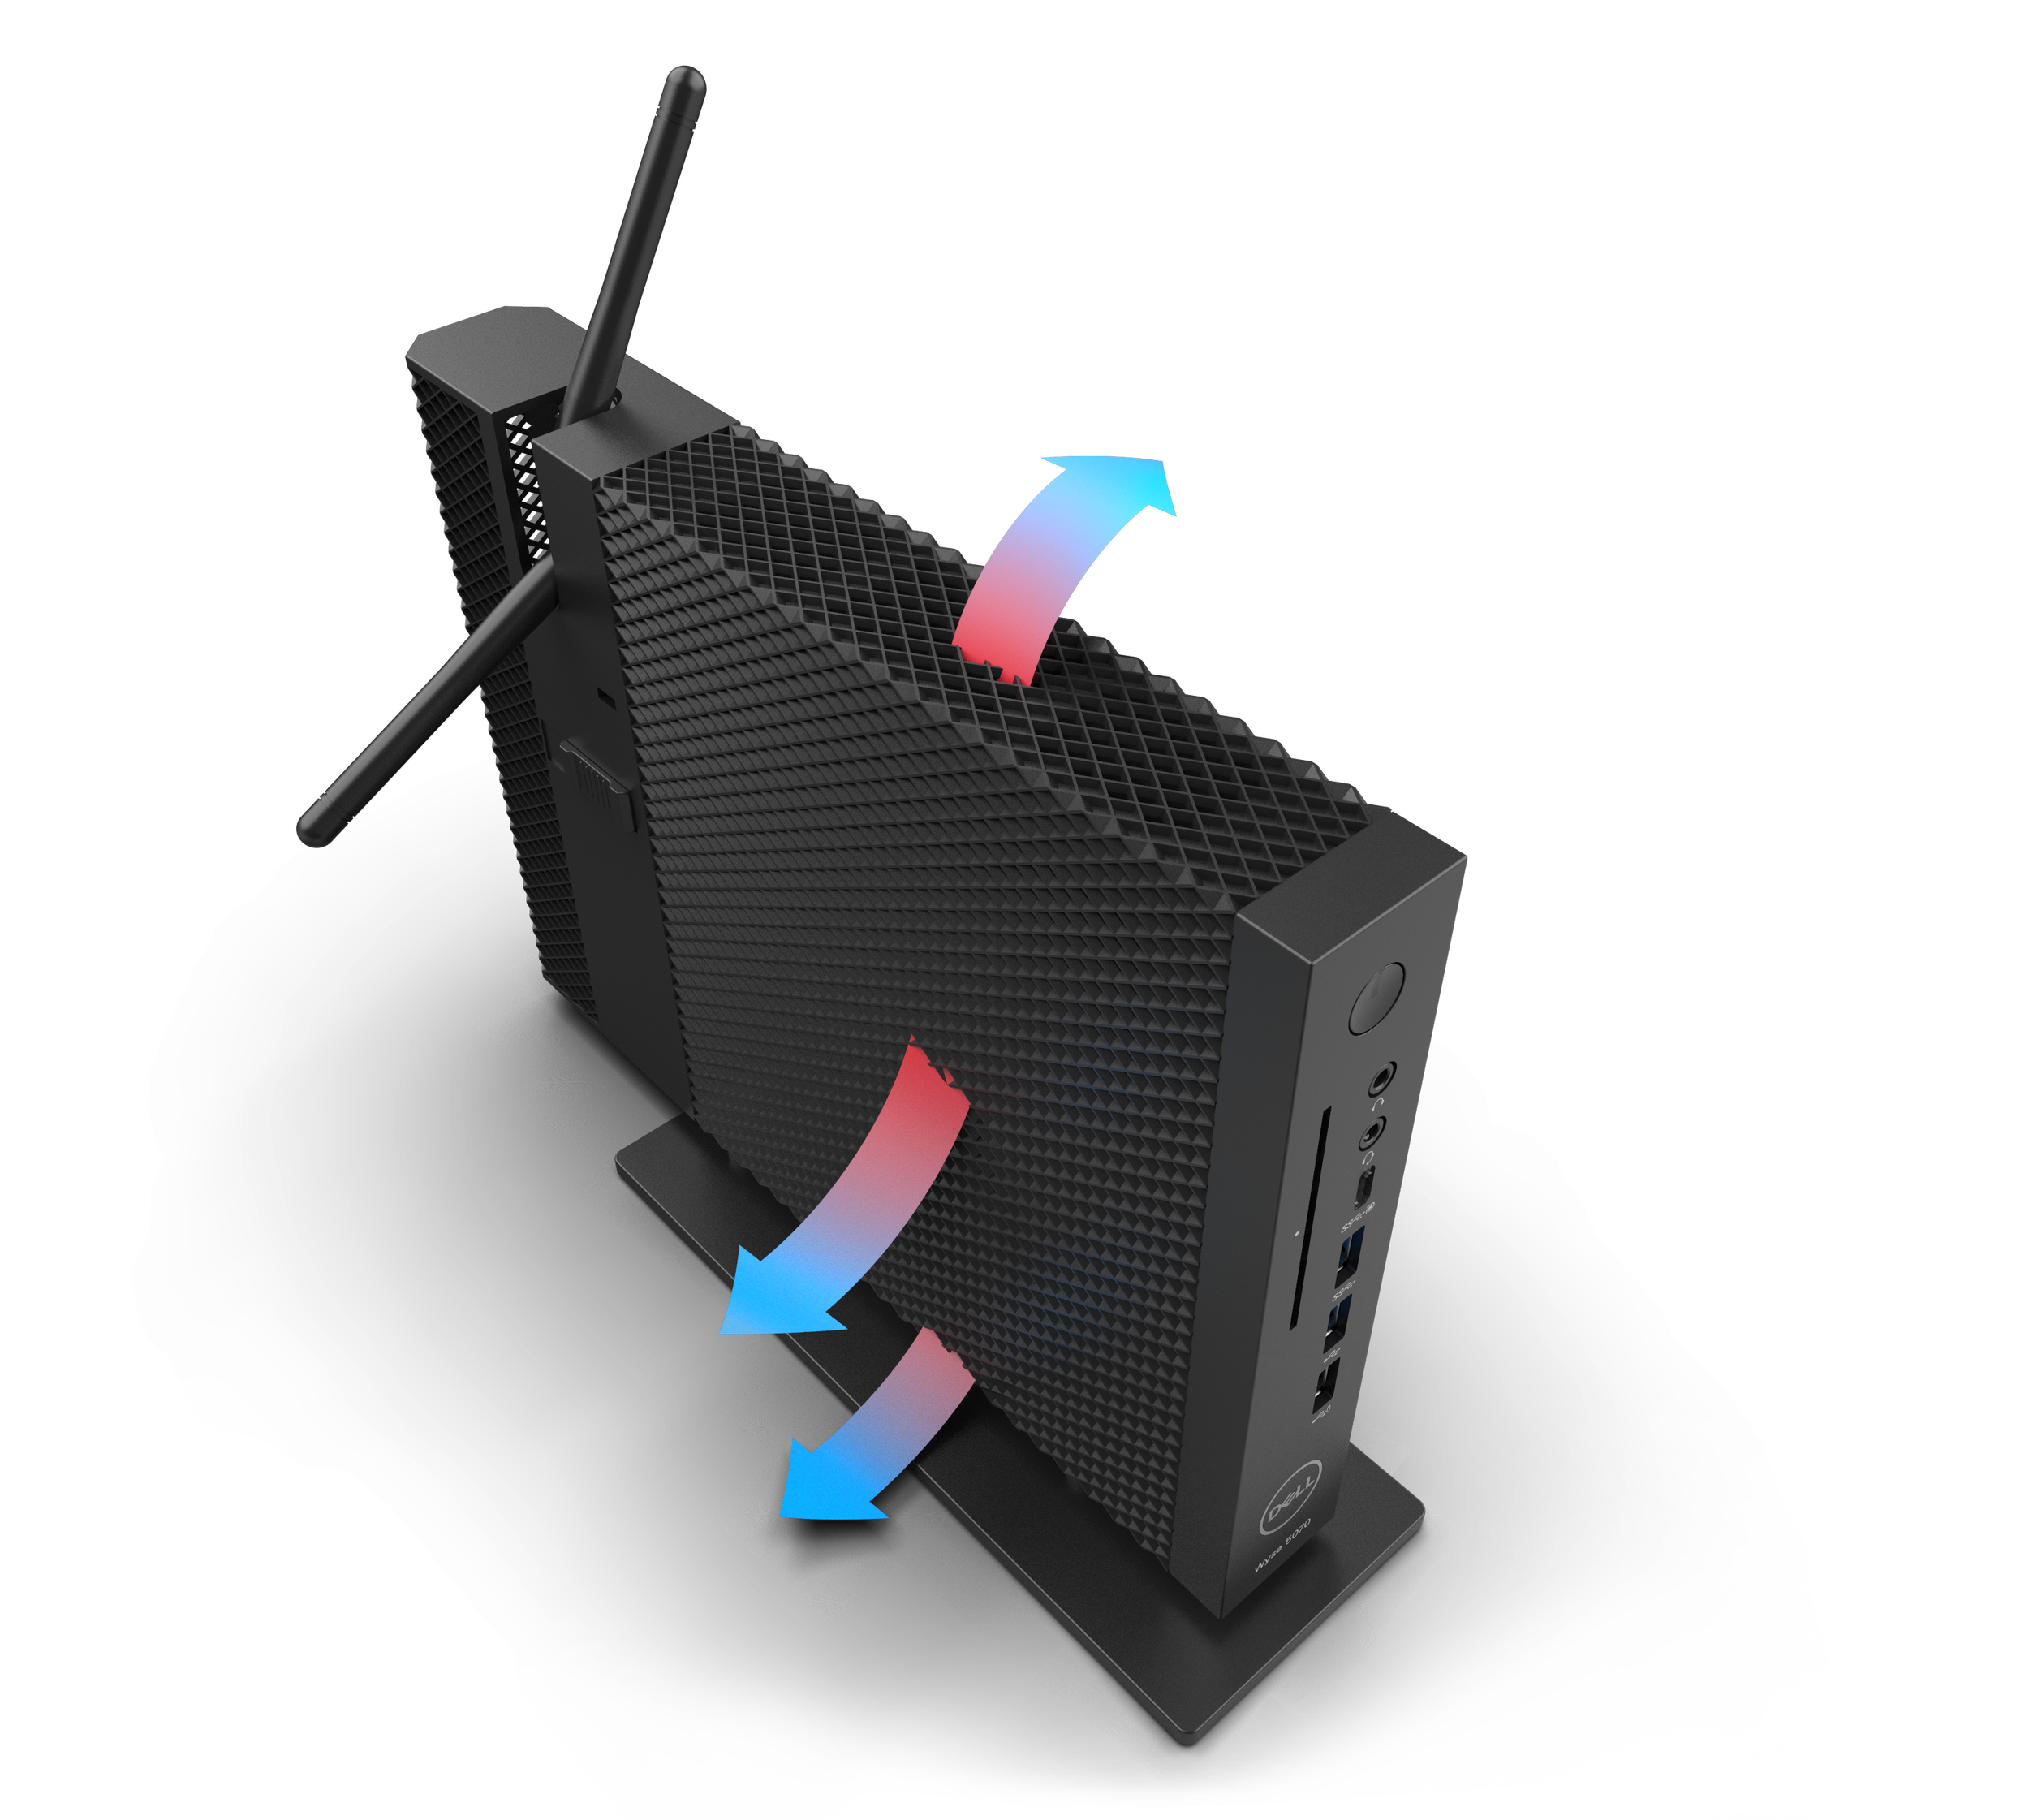
The Wyse 5070 is an affordable, low powered thin client computer. To reduce cost, energy consumption and maximize internal packaging,
the 5070 is an air cooled design. Ventilation is needed from the top, side and bottom. This requirement dictated the design of the computer,
as well as the mounting accessories needed for this computer.

With 3-sided ventilation, a special vertical stand is needed for proper cooling. Both Wyse 5070 slim and wide versions fit onto an
elevated tripod stand by a keyhole fitting.

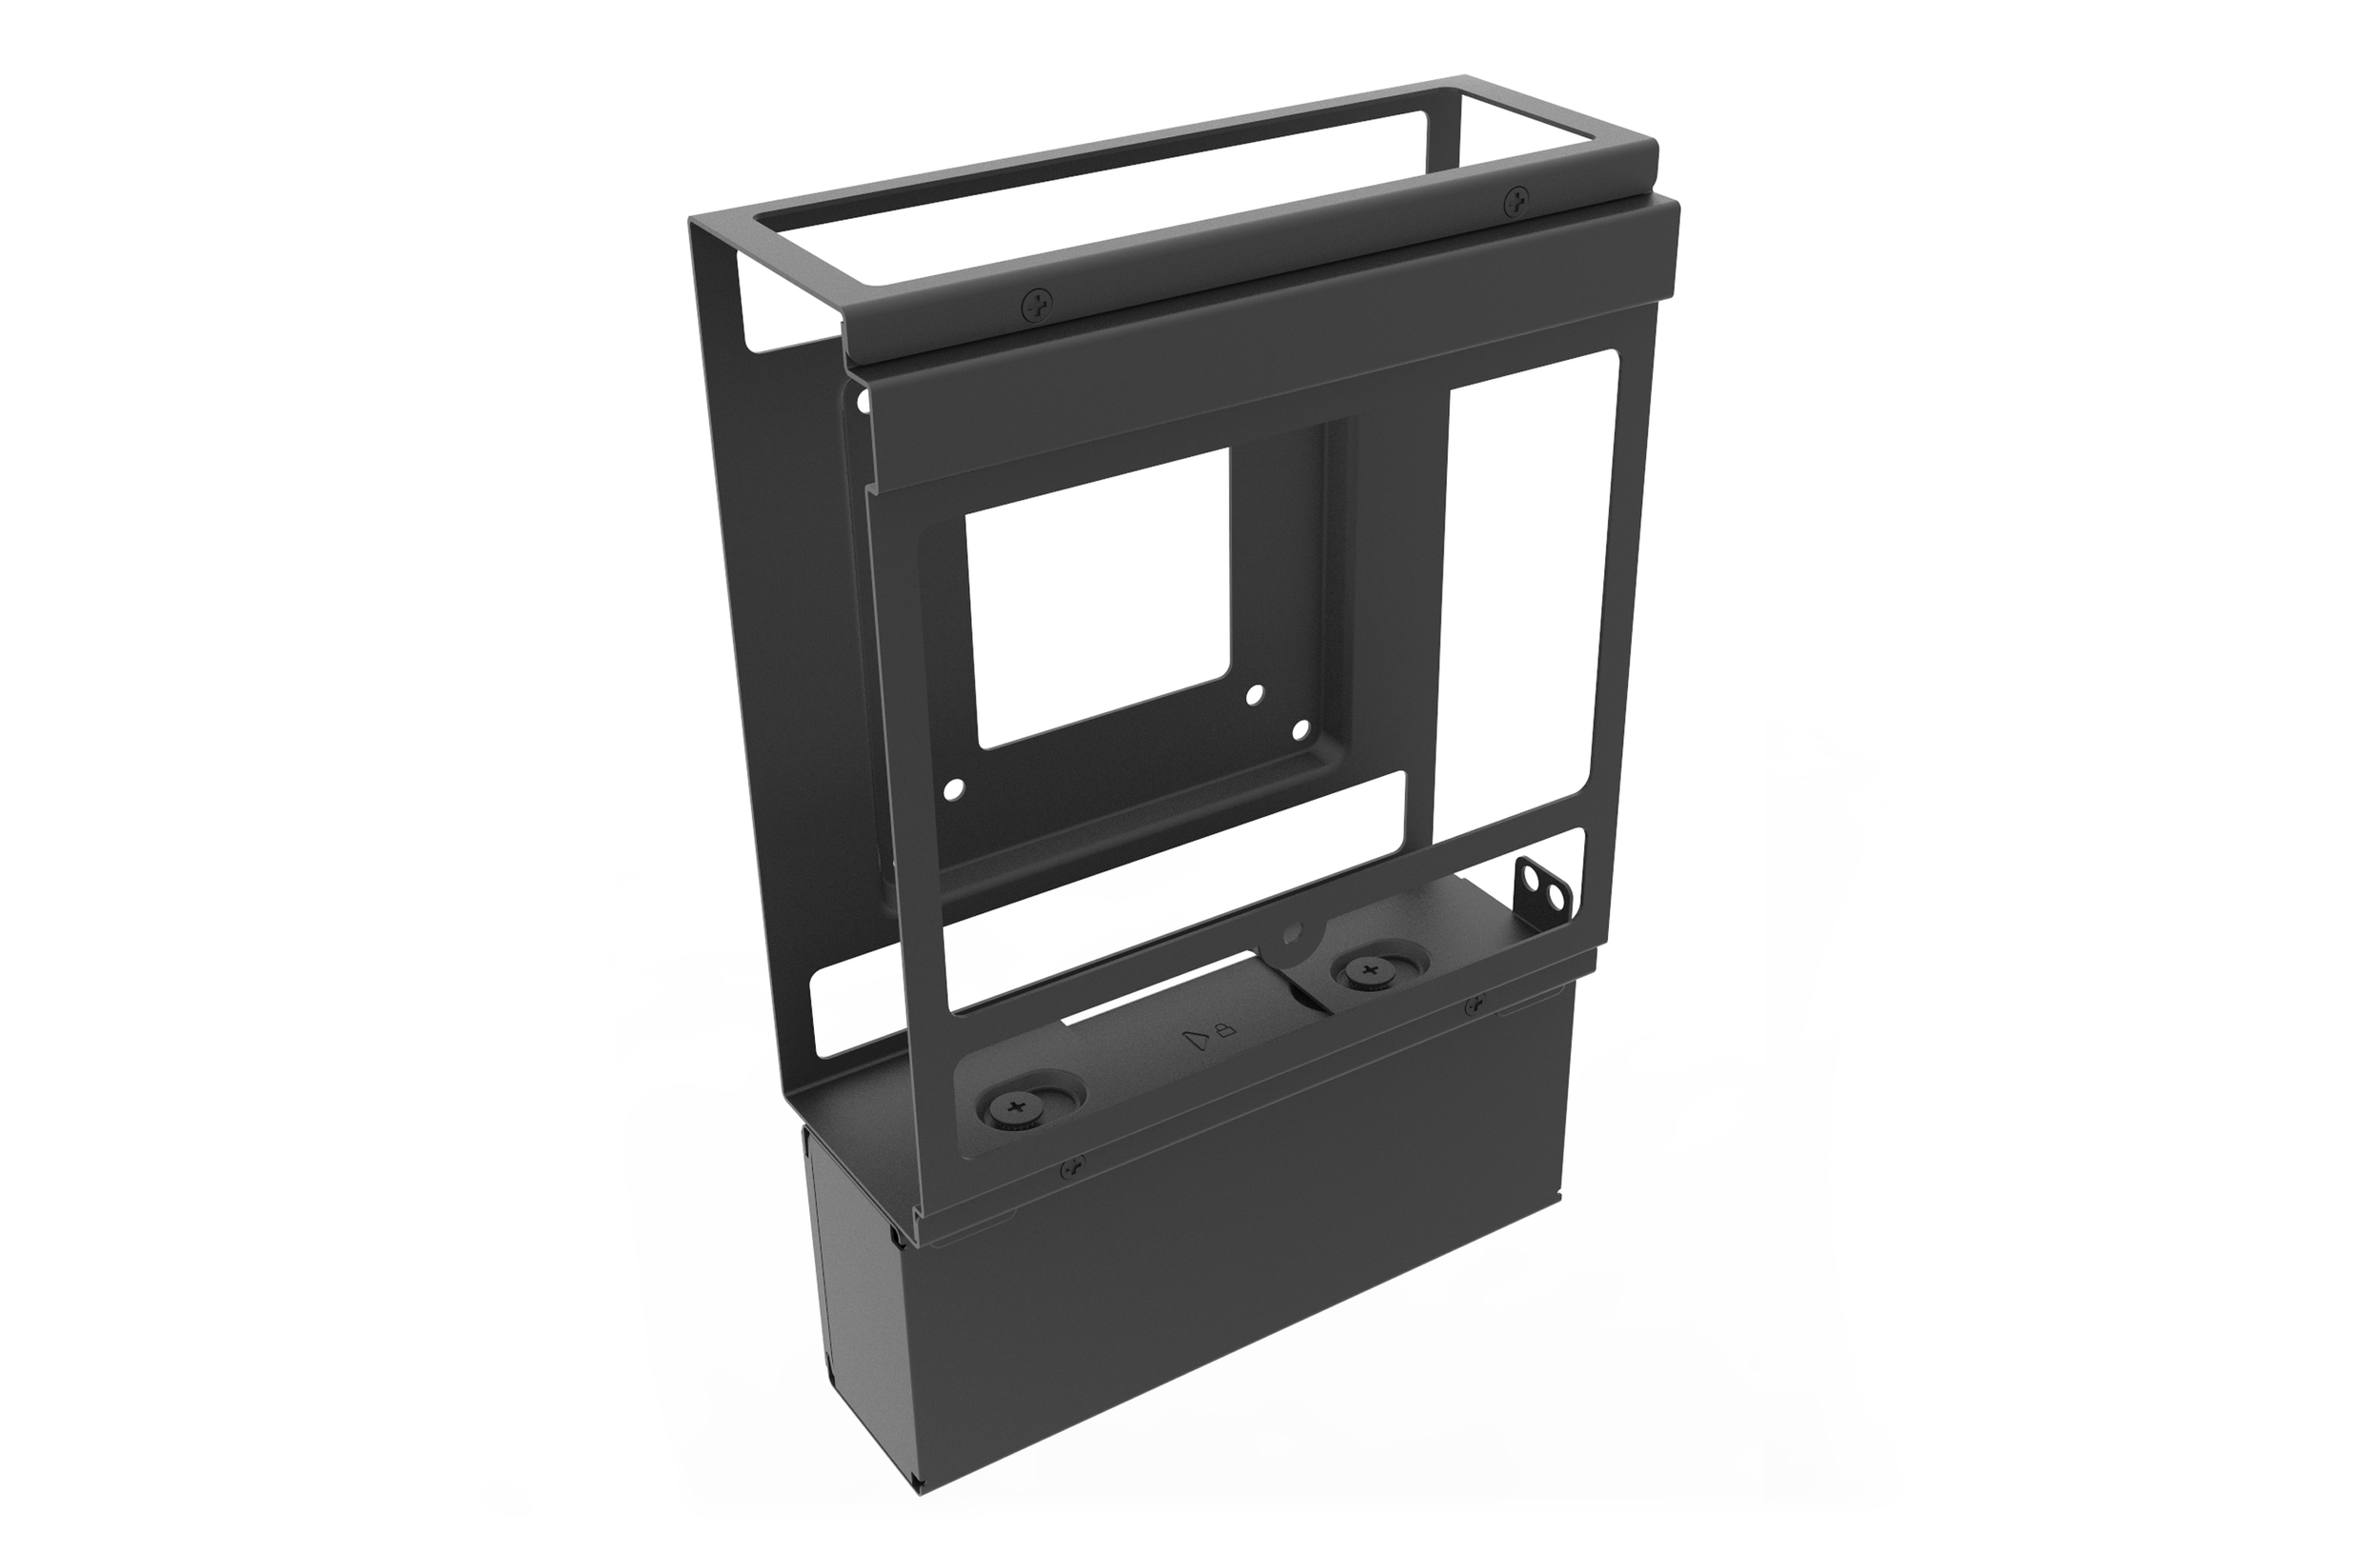
We developed mounting brackets for both the slim and wide versions of the 5070. The brackets feature a matching hole pattern that allows for ventilation.
The mounting bracket can include a detachable box for a power supply unit.
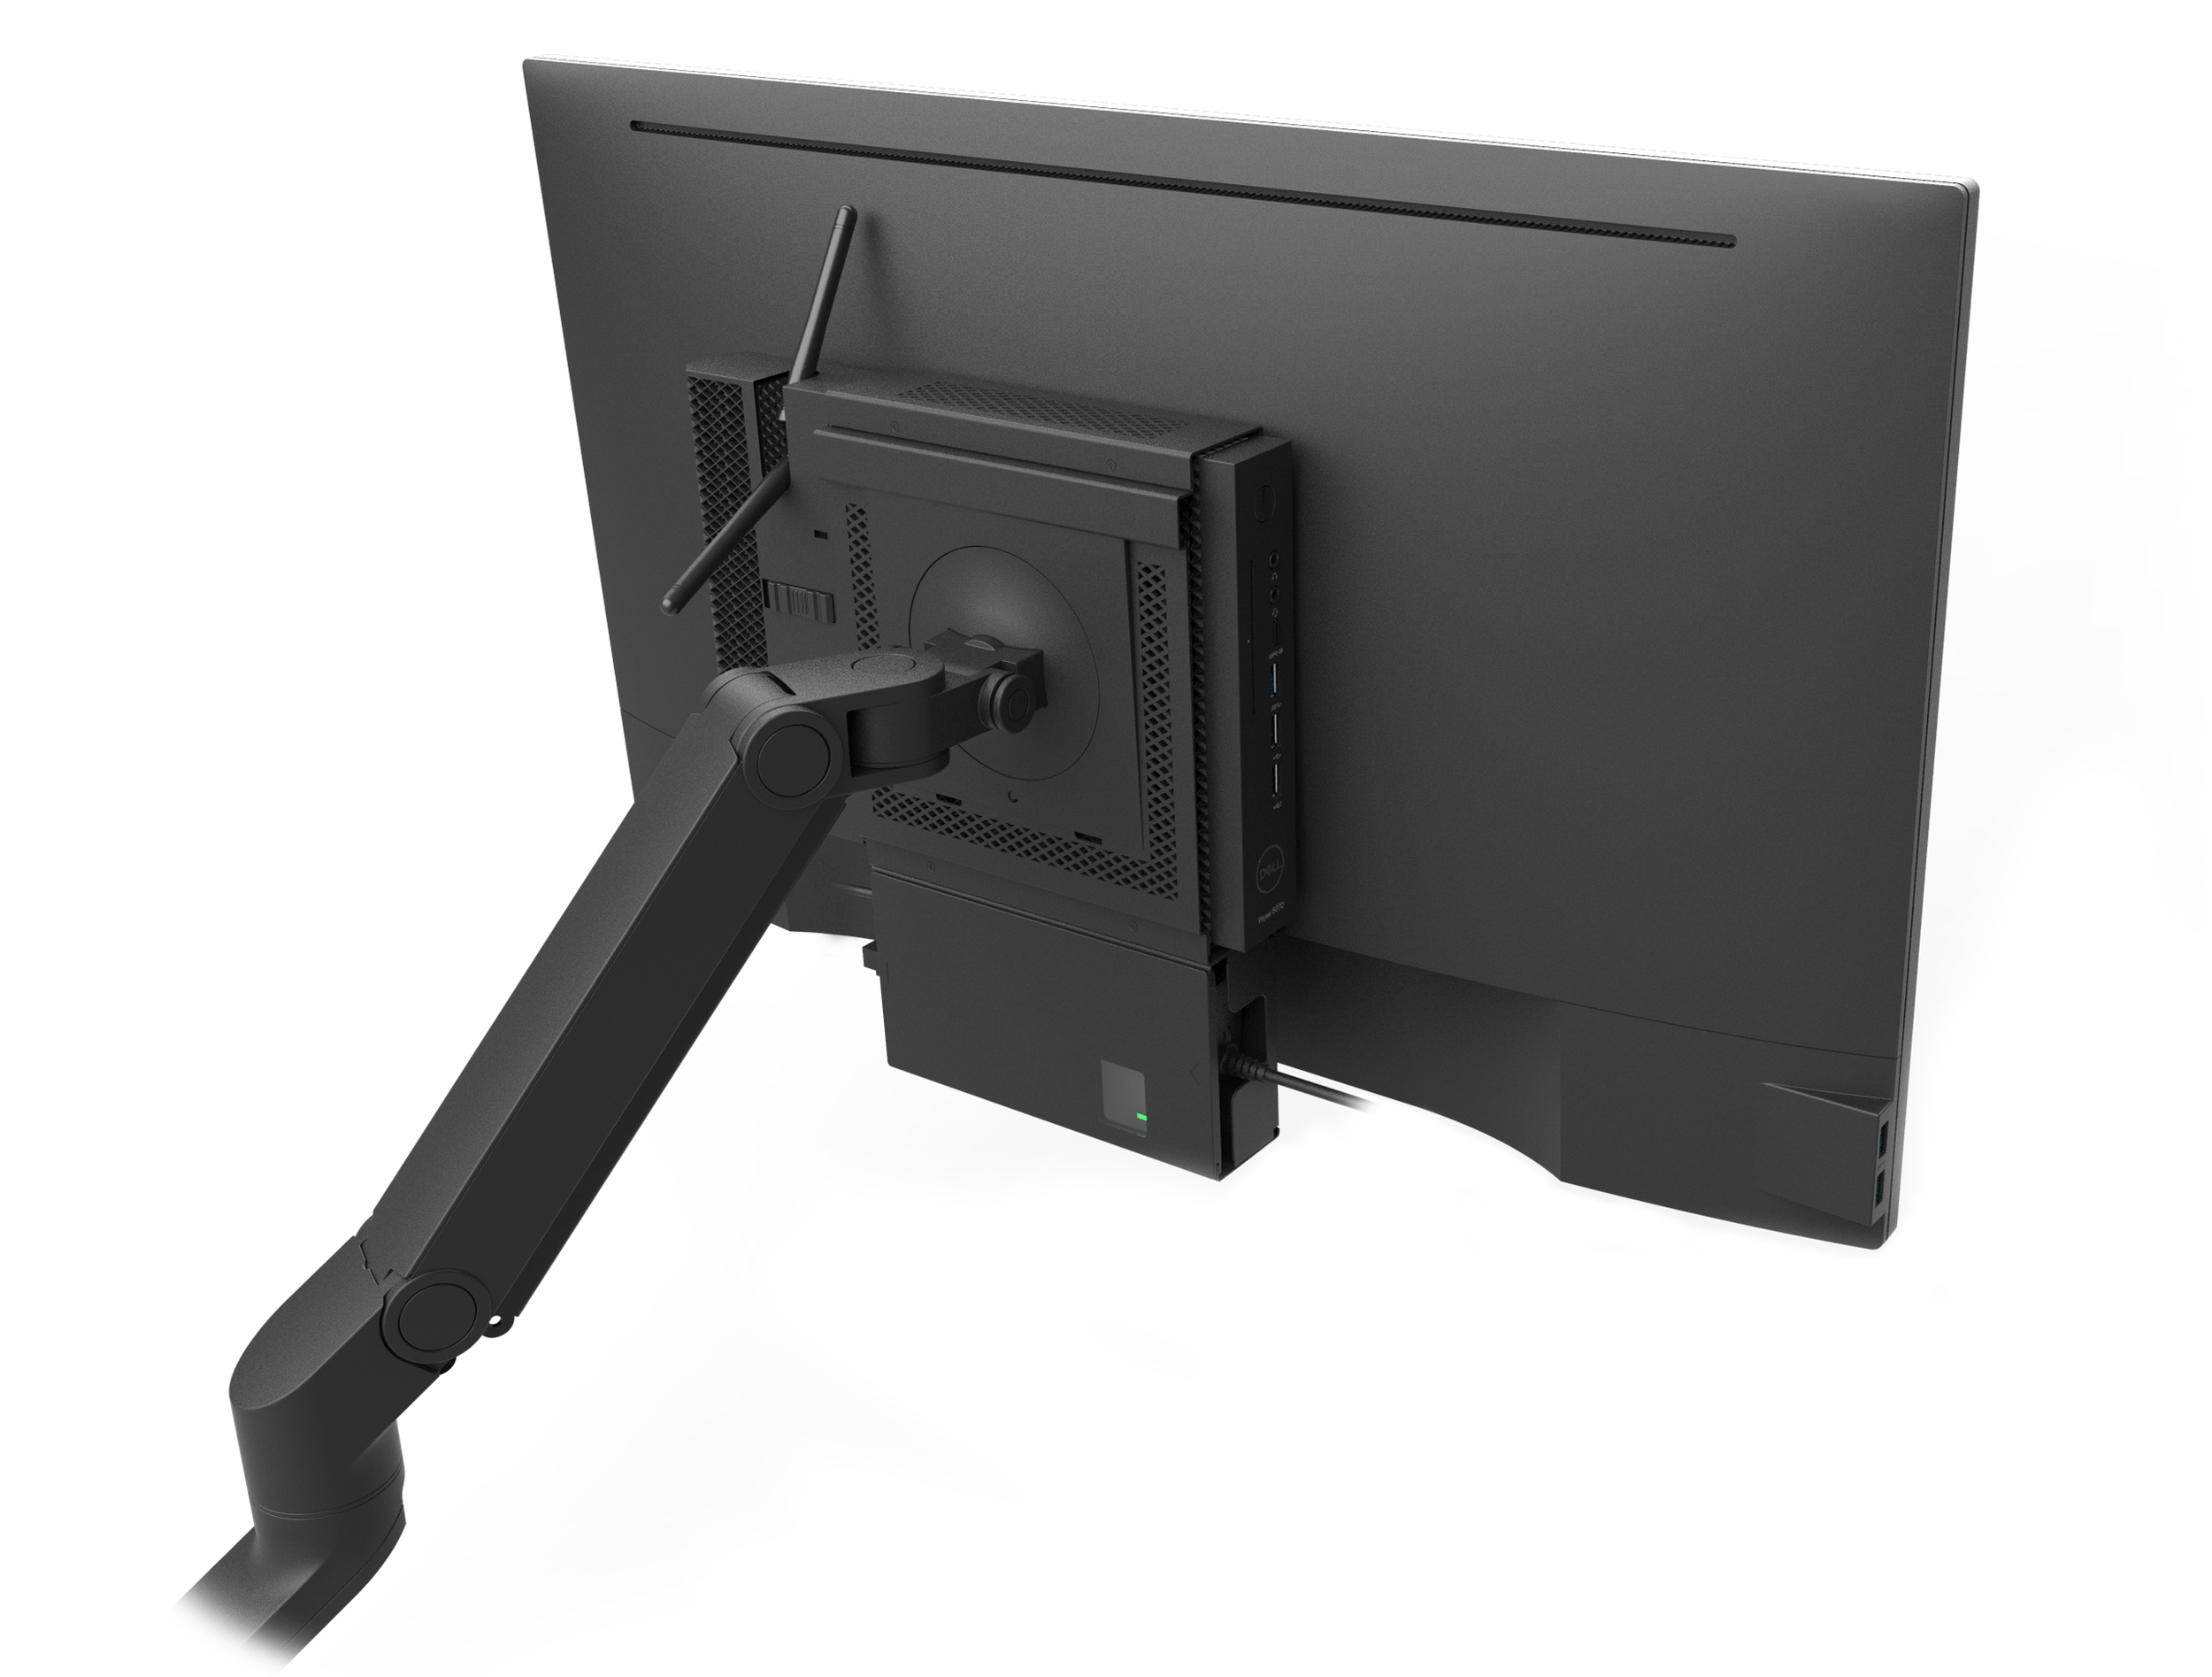
This mount can be used in conjunction with an adjustable monitor arm.

The Wyse 5070 is light enough to be wall mounted using this bracket design.

The Wyse 5070 needed to mount on the back of a variety of Dell monitors. We developed an adjustable mounting bracket that can fit different widths of monitor risers.

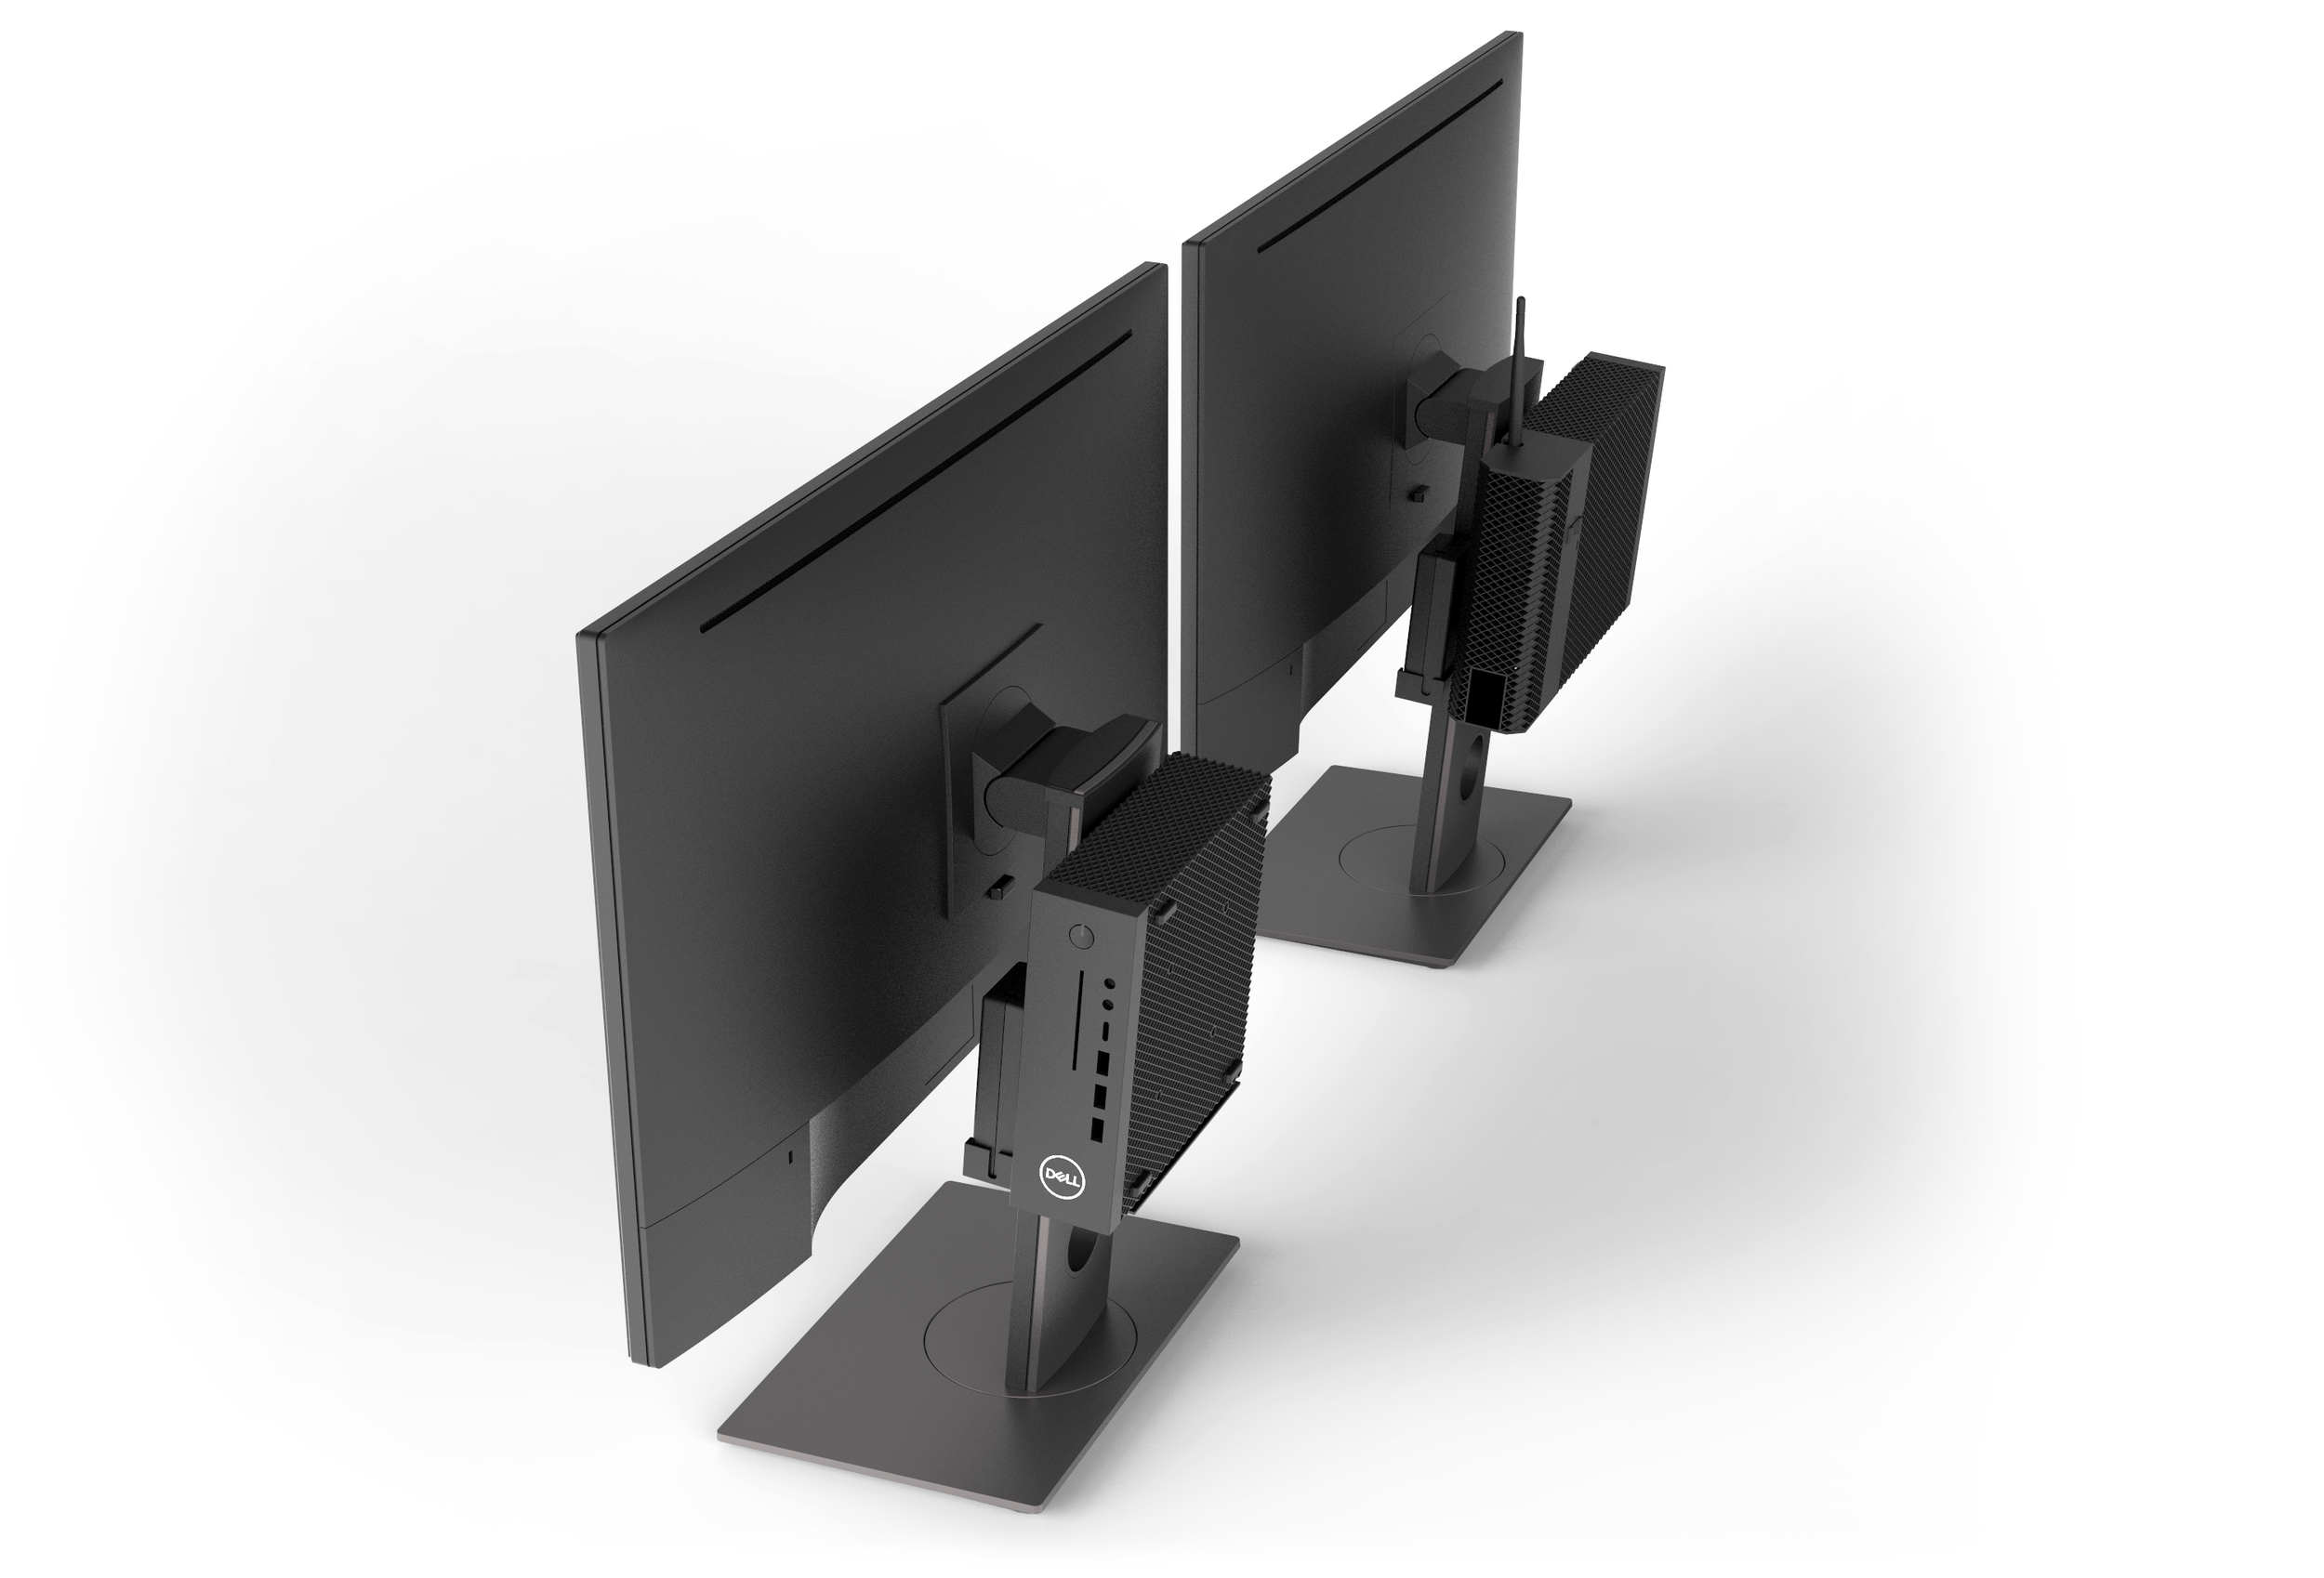
The E-series fixed stand monitor features a special mount that can accommodate both versions of the Wyse 5070
and a power supply unit box.
initial development

I came onboard after the computer went through several design iterations. As the thin client requirements evolved, so did the designs.
The new Wyse thin client computer had to feature Dells Pro 1.0 design language. Pro 1.0 is simple, purposeful design
with the angled diamond vent pattern that is seen on OptiPlex commercial PCs.

Initially the Wyse thin client computer was supposed to include a center mounted I/O,
with a rotatable Dell badge thats seen on the OptiPlex Micro Form Factor.

As the project progressed, a center mounted motherboard was seen to be too expensive.
This direction explored a left justified I/O, and a “two tiered” layered design.

When I came onboard with this project, the design evolved to feature right justified ports and a centered power button and logo.
The bezel grew in depth for a stronger, blockier appearance. With the new ventilation requirements, the thin client had to incorporate three sided ventilation;
on the top, left side and bottom. An elevated vertical stand was proposed to allow for bottom ventilation.

q
The Wyse team had certain requirements for this thin client computer. Those requirements led to the chosen design direction being modeled in Creo.
Both Slim and Wide versions were created, along with the accompanying cable covers.

In addition to creating a wide body thin client computer, the Wyse team wanted to explore the idea of a hooking a module up to the slim chassis computer.
The module would contain contain additional ports, optical drive or card reader

Wyse wanted to explore the idea of a sidecar that attaches to the side of the thin client computer. This sidecar uses
different modules for a card reader or additional ports. This idea didn’t work out, because it was more inconvenient to connect the modules vs
having a standalone wide computer with legacy ports.

We focused on developing the thin and wide versions of the thin client computer. Wyse wanted a computer that looks appropriate within Dell’s lineup.
Pictured are the Wyse thin client computers alongside Dells OptiPlex MFF computer.

We explored several iterations of the wide body thin client computer. The left features a center justified power button and logo.
The middle features a grove, and the right features a stepped in surface.

We pursued the direction of keeping the front bezel clean between both models. The wide thin client computer features side mounted feet and a rotatable badge,
which can be utilized vertically or horizontally.

Both models feature 4x USB 3.0, 3x DisplayPorts, RJ45 ethernet port, dual antenna module, serial port and a swappable auxiliary port.
The wide chassis features an additional serial port and a legacy parallel port of printer connection.
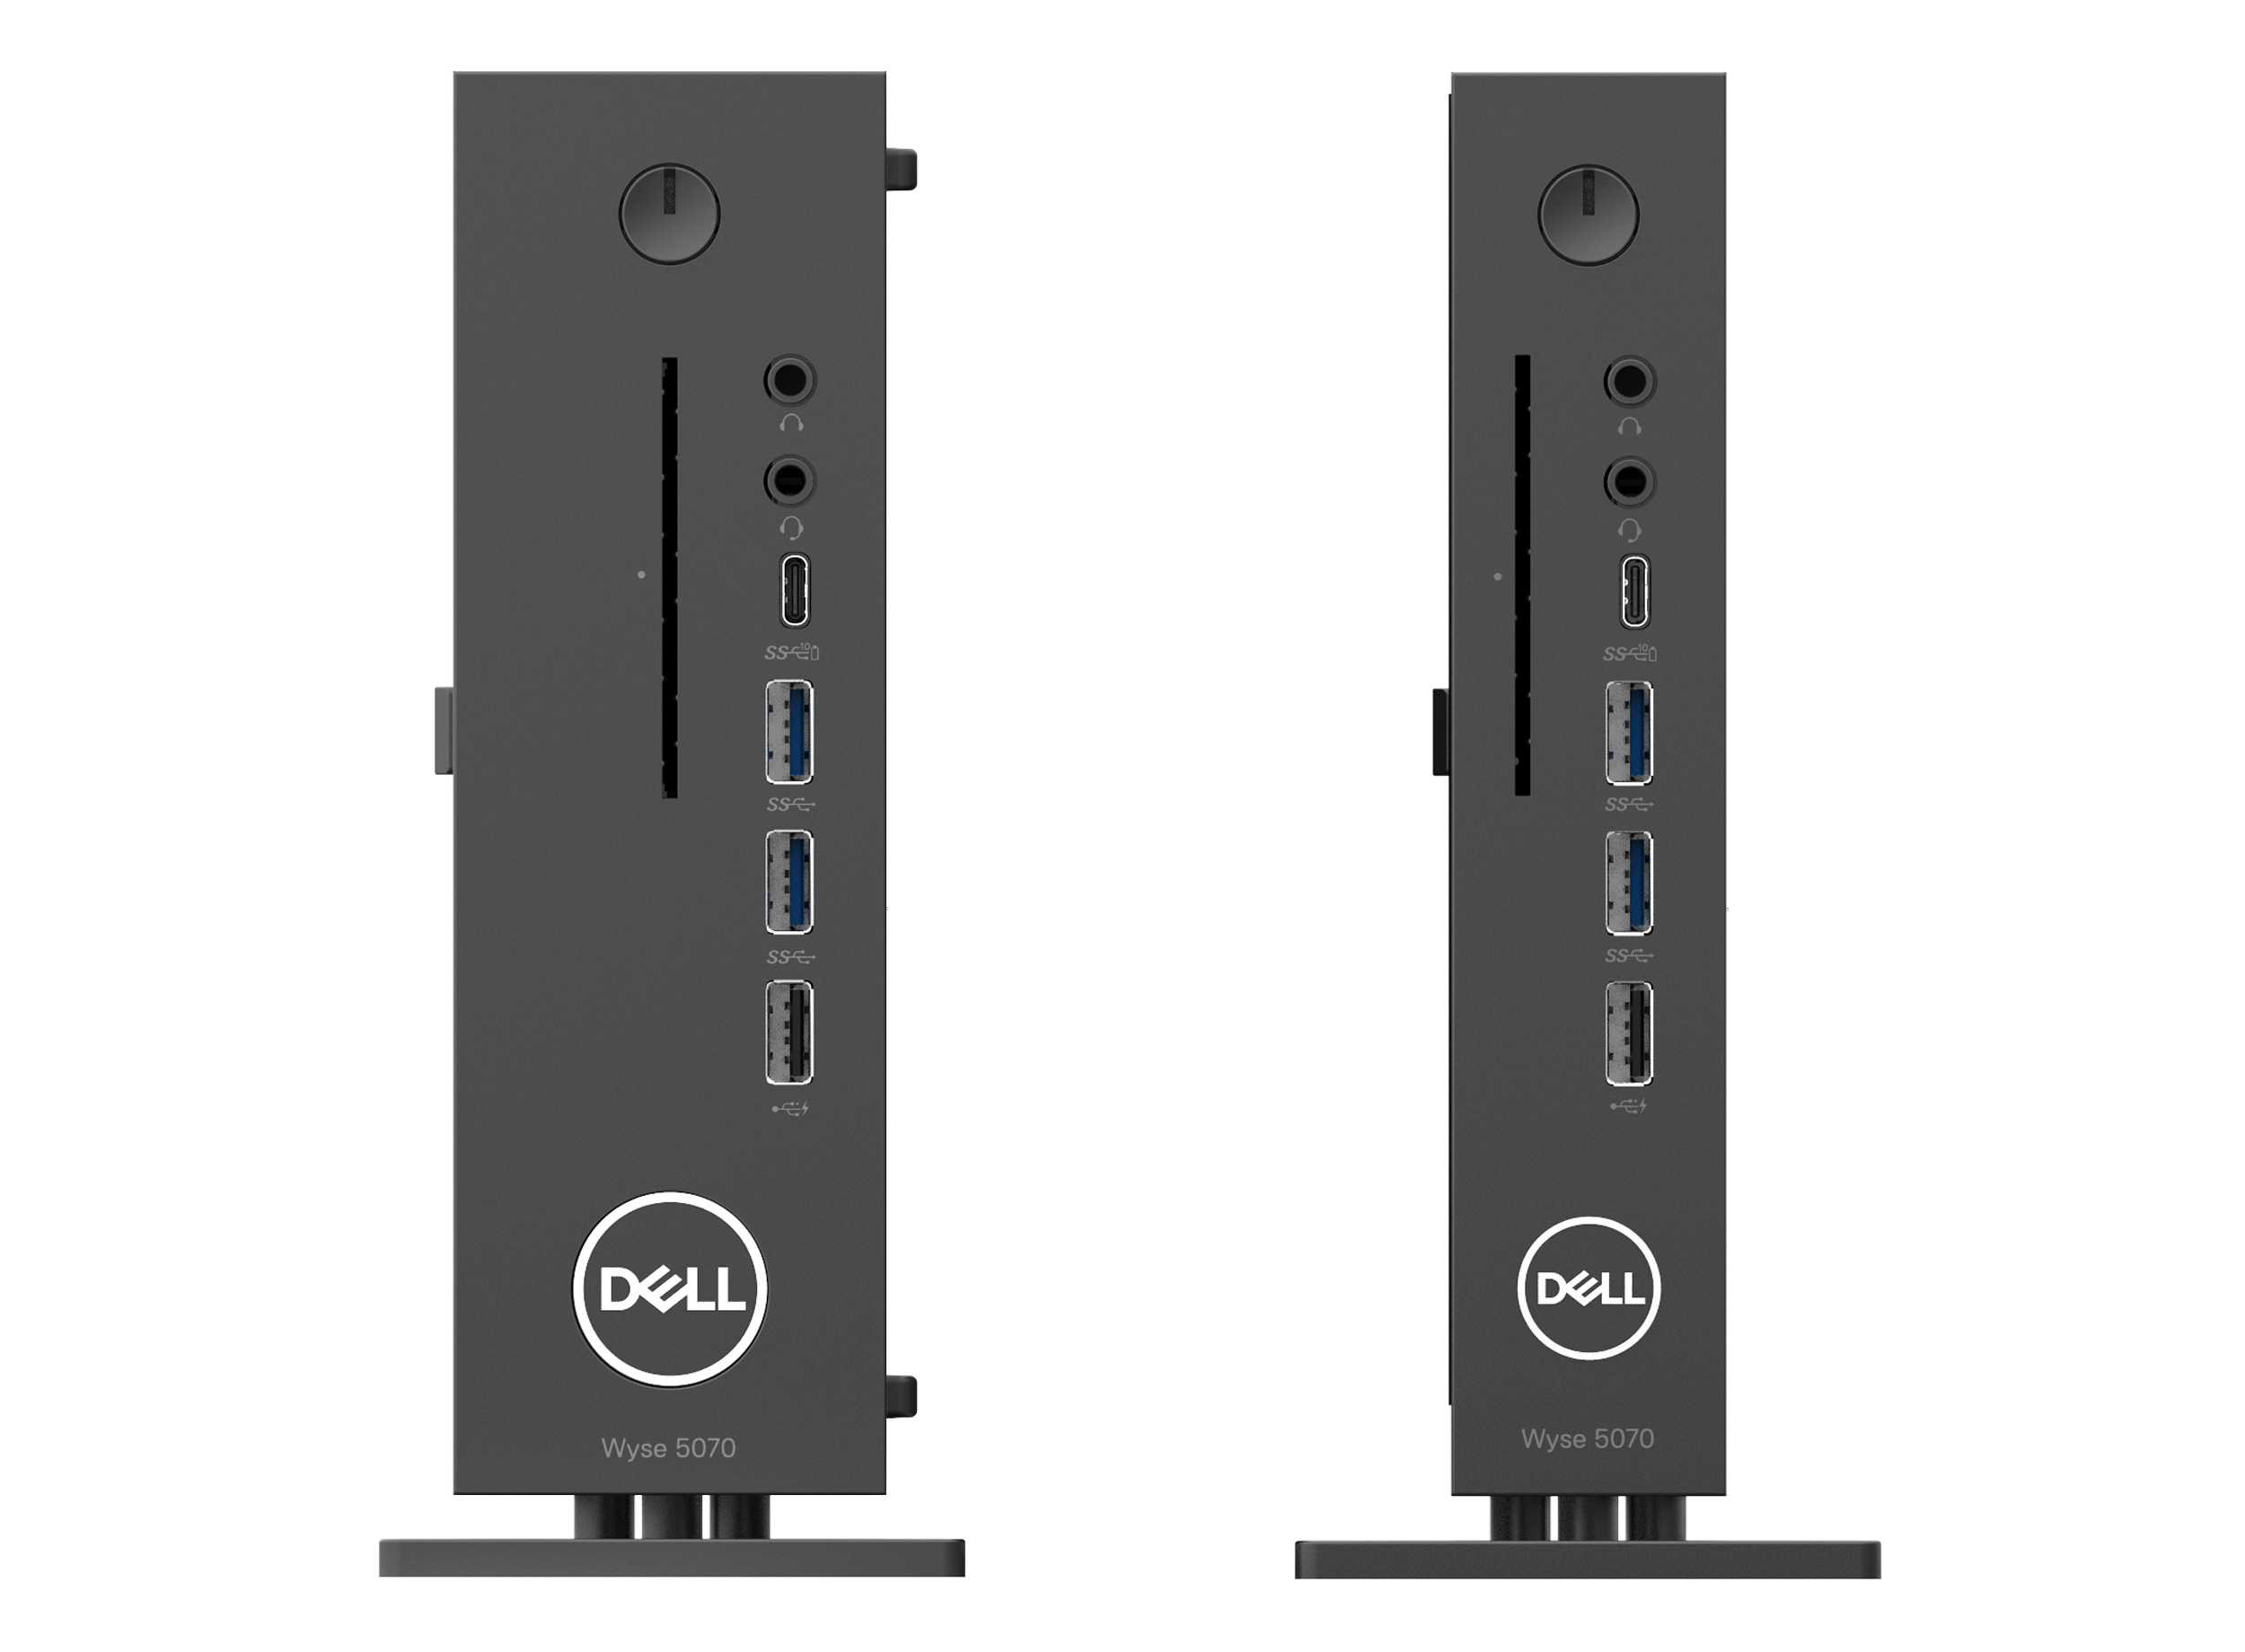
Both models share 2x audio ports, USB-C DisplayPort, 2x USB-A 3.0, USB-A 2.0 ports and an optional Smartcard reader slot.
mounting solutionS
In addition to designing the thin client computer, we had to think of solutions on how both models can be mounted on P and U series monitors, on a wall, on a monitor arm and on the E series monitor. We explored solutions that either incorporated the keyhole openings on the bottom of the computers, as well as the built in VESA holes.
P/U series Monitor mounting
The initial design for the monitor mount came from the factory. It was very bulky, and didn’t allow for clean cable management.
The Wyse team wanted to mount the slim client computer onto the back of a monitor while still retaining ventilation.
An initial idea we explored utilized standoffs molded into the back of the monitor riser.
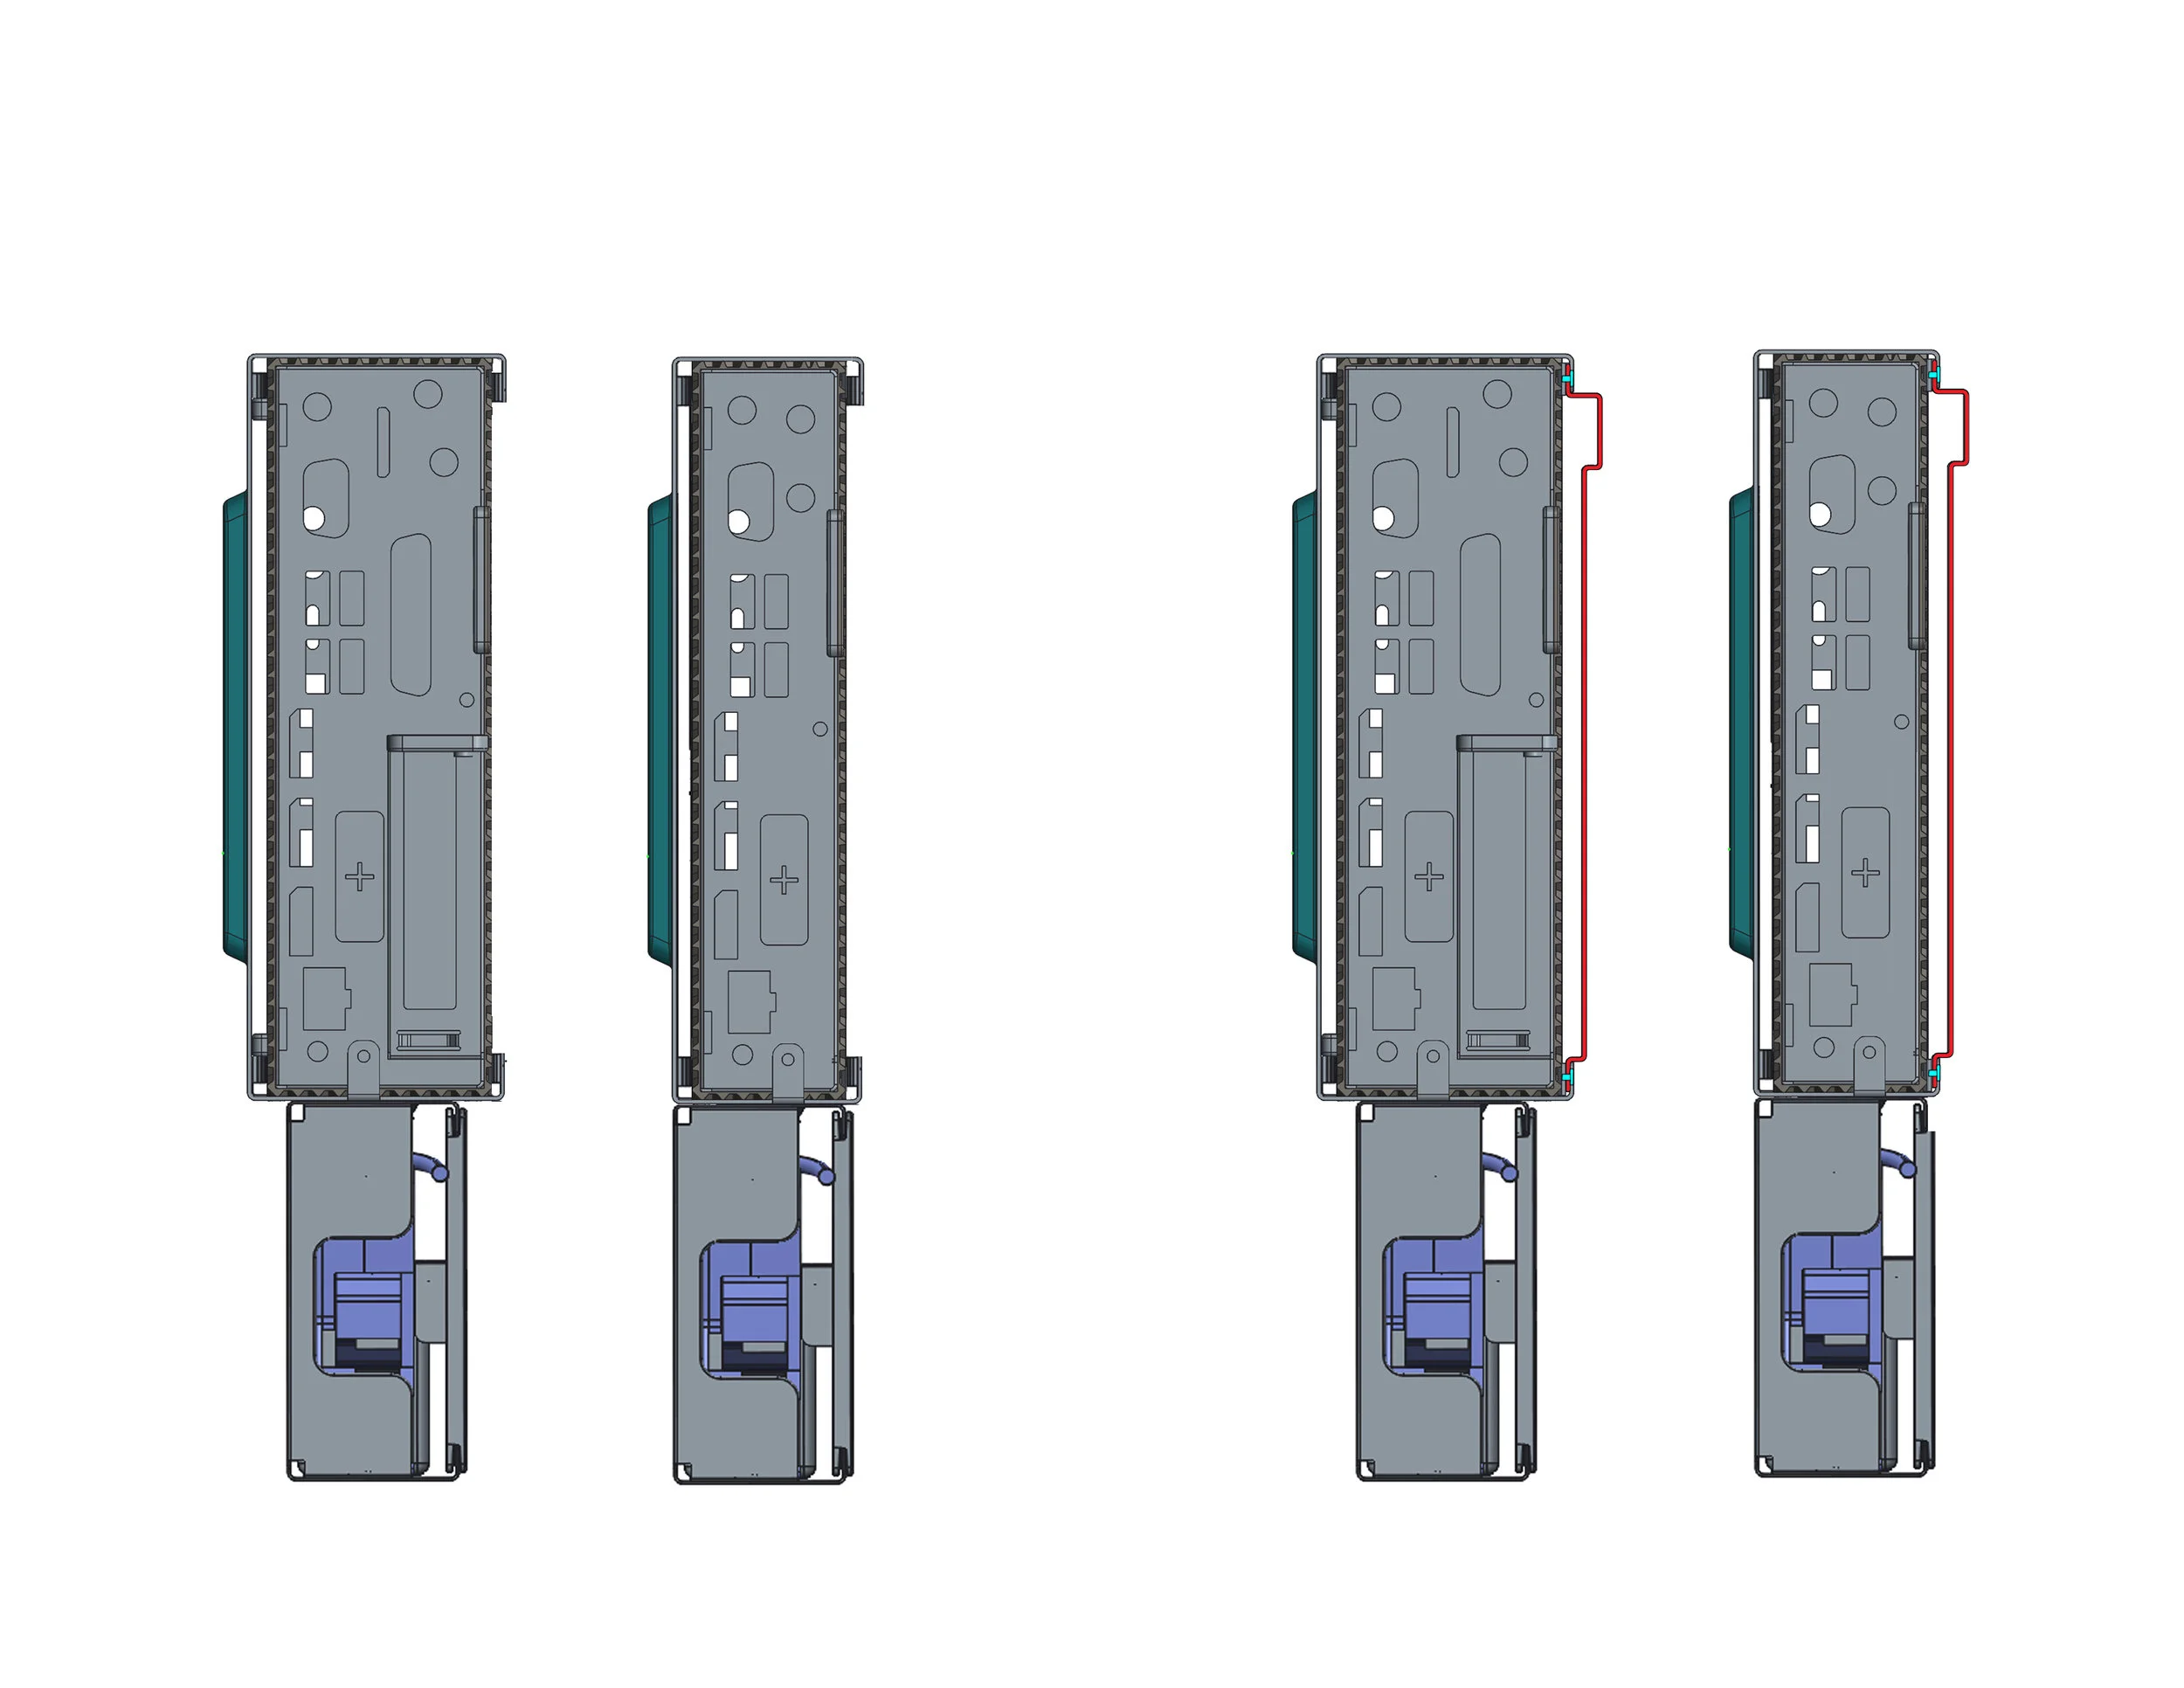
As development continued, we explored a mounting bracket option that works on the common P series monitor.
The left option uses a platform with standoffs that the thin client slides onto. The right option utilizes the VESA holes located on the right side of the thin client computer.
The VESA hole option is pursued, because of its cleaner appearance. VESA mounting allows for a more secure fit and cleaner cable management.


Rather than design a variety of monitor mounts for all the different monitor models, we wanted a single mount that can be adjustable.
The manufacturer proposed an idea that hooks on top and has a clip on bottom that secures the mount onto the neck of the stand.

The PU mount was designed around the mechanism the manufacturer proposed. A spring holds the plate up, keeping the wings closed in.
The user will open the wings of the PU mount, and the wings will adjust to the appropriate width monitor stand.

We styled the P/U series mount to be more consistent with Dell’s design language. The top hook and bottom clip are interchangeable
and come indifferent widths for the various monitor models.
The mount can expand and contract to a variety of different sized monitor stands. From 130mm for the widest stand to the narrowest stand at 69mm.
Wall/Arm Mount
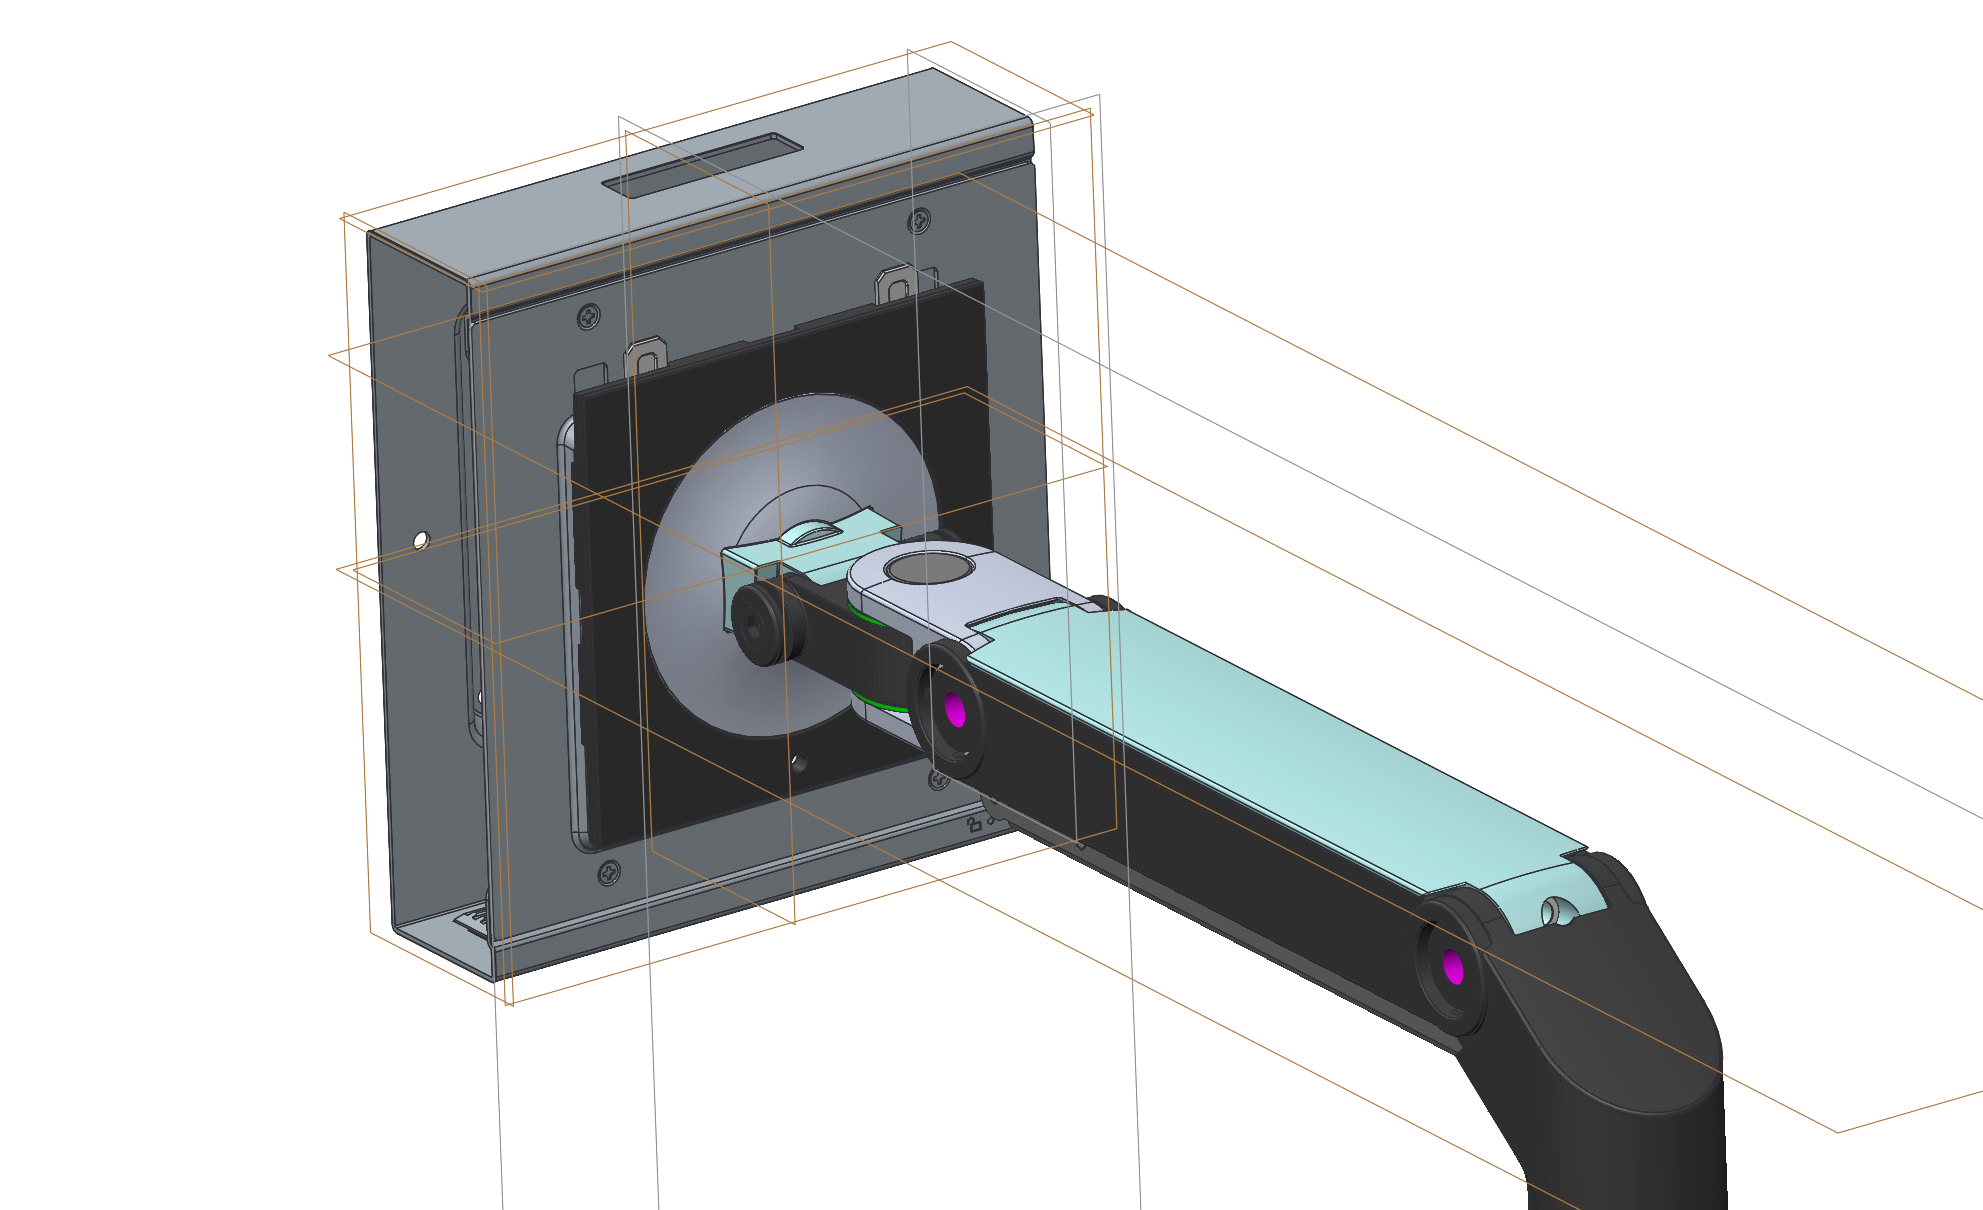
The initial design from the factory consisted of basic folded sheetmetal construction. It didn’t allow for proper ventilation that the Wyse 5070 needed.
An initial thought was to create more openings for ventilation. This design is more airy, but lacked structural integrity.
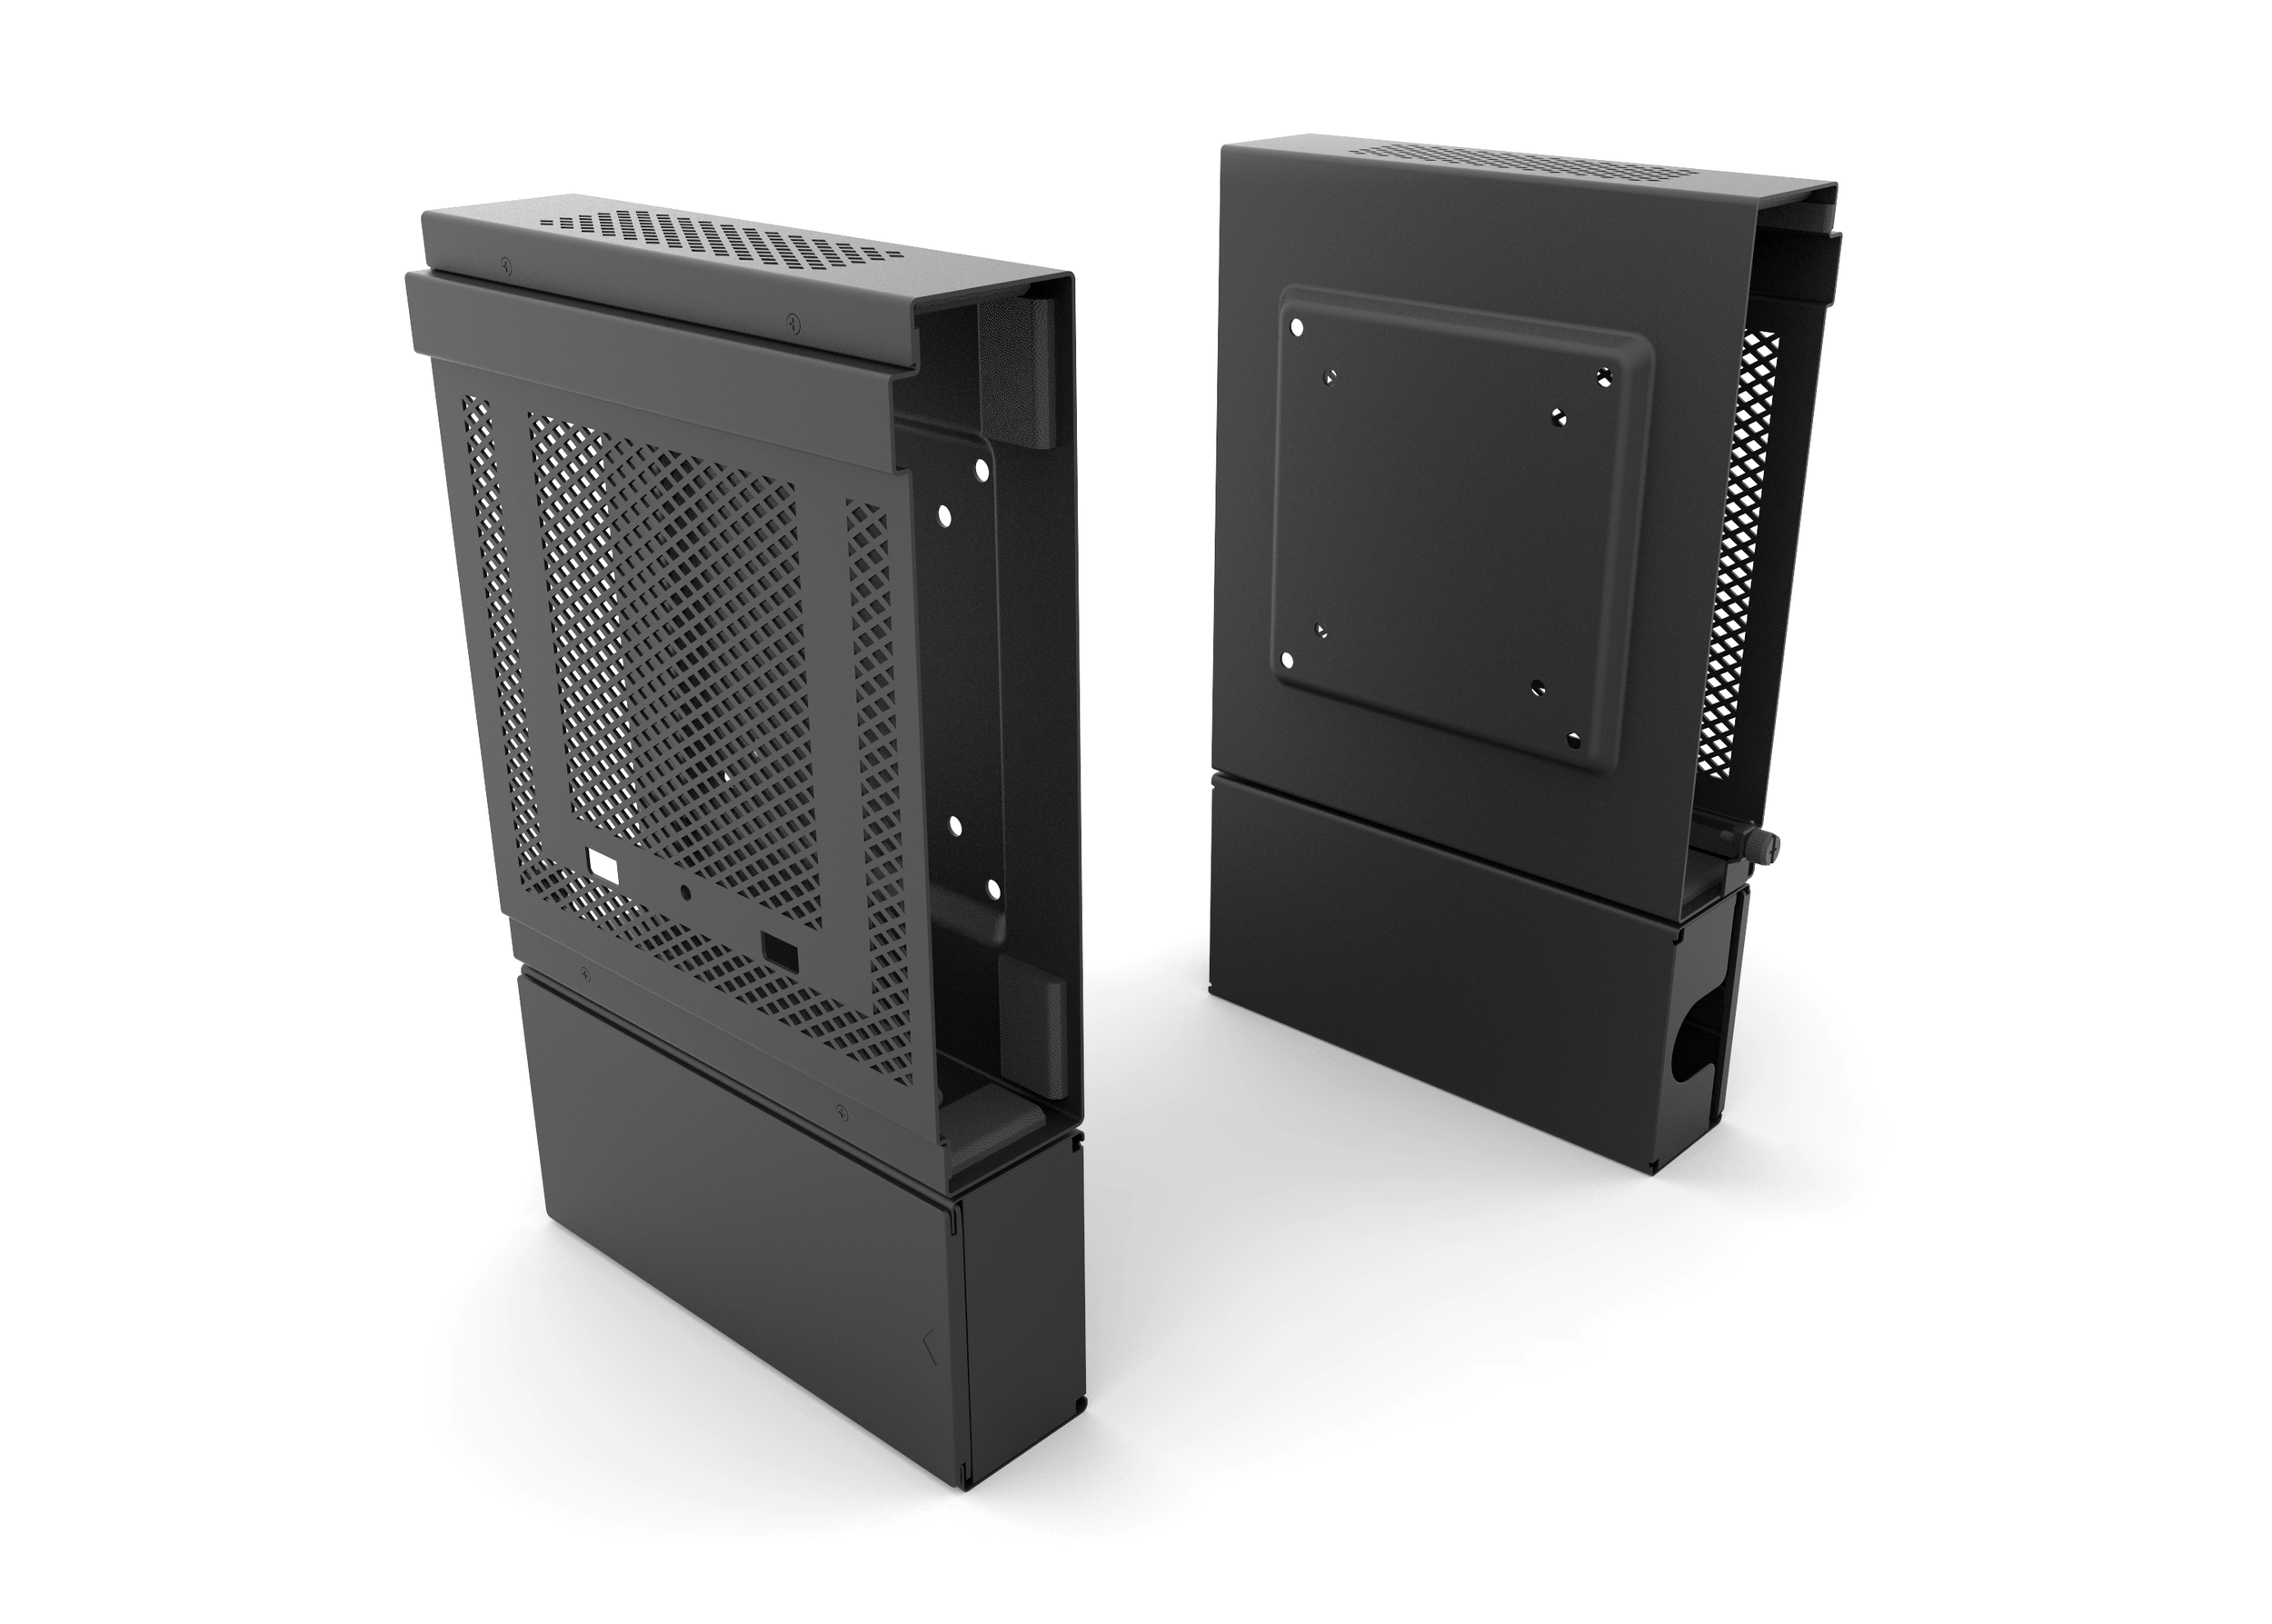
The finalized design balances ventilation and structural integrity with ventilation patterns.
There are two designs for both the slim and wide 5070 form factors. An additional plate is screwed onto the wall mount to create the arm mount.
The slim and wide chassis computers are secured within the mount with rubber bumpers. A thumbscrew on the mount screws into the computer,
securing it on the mount.
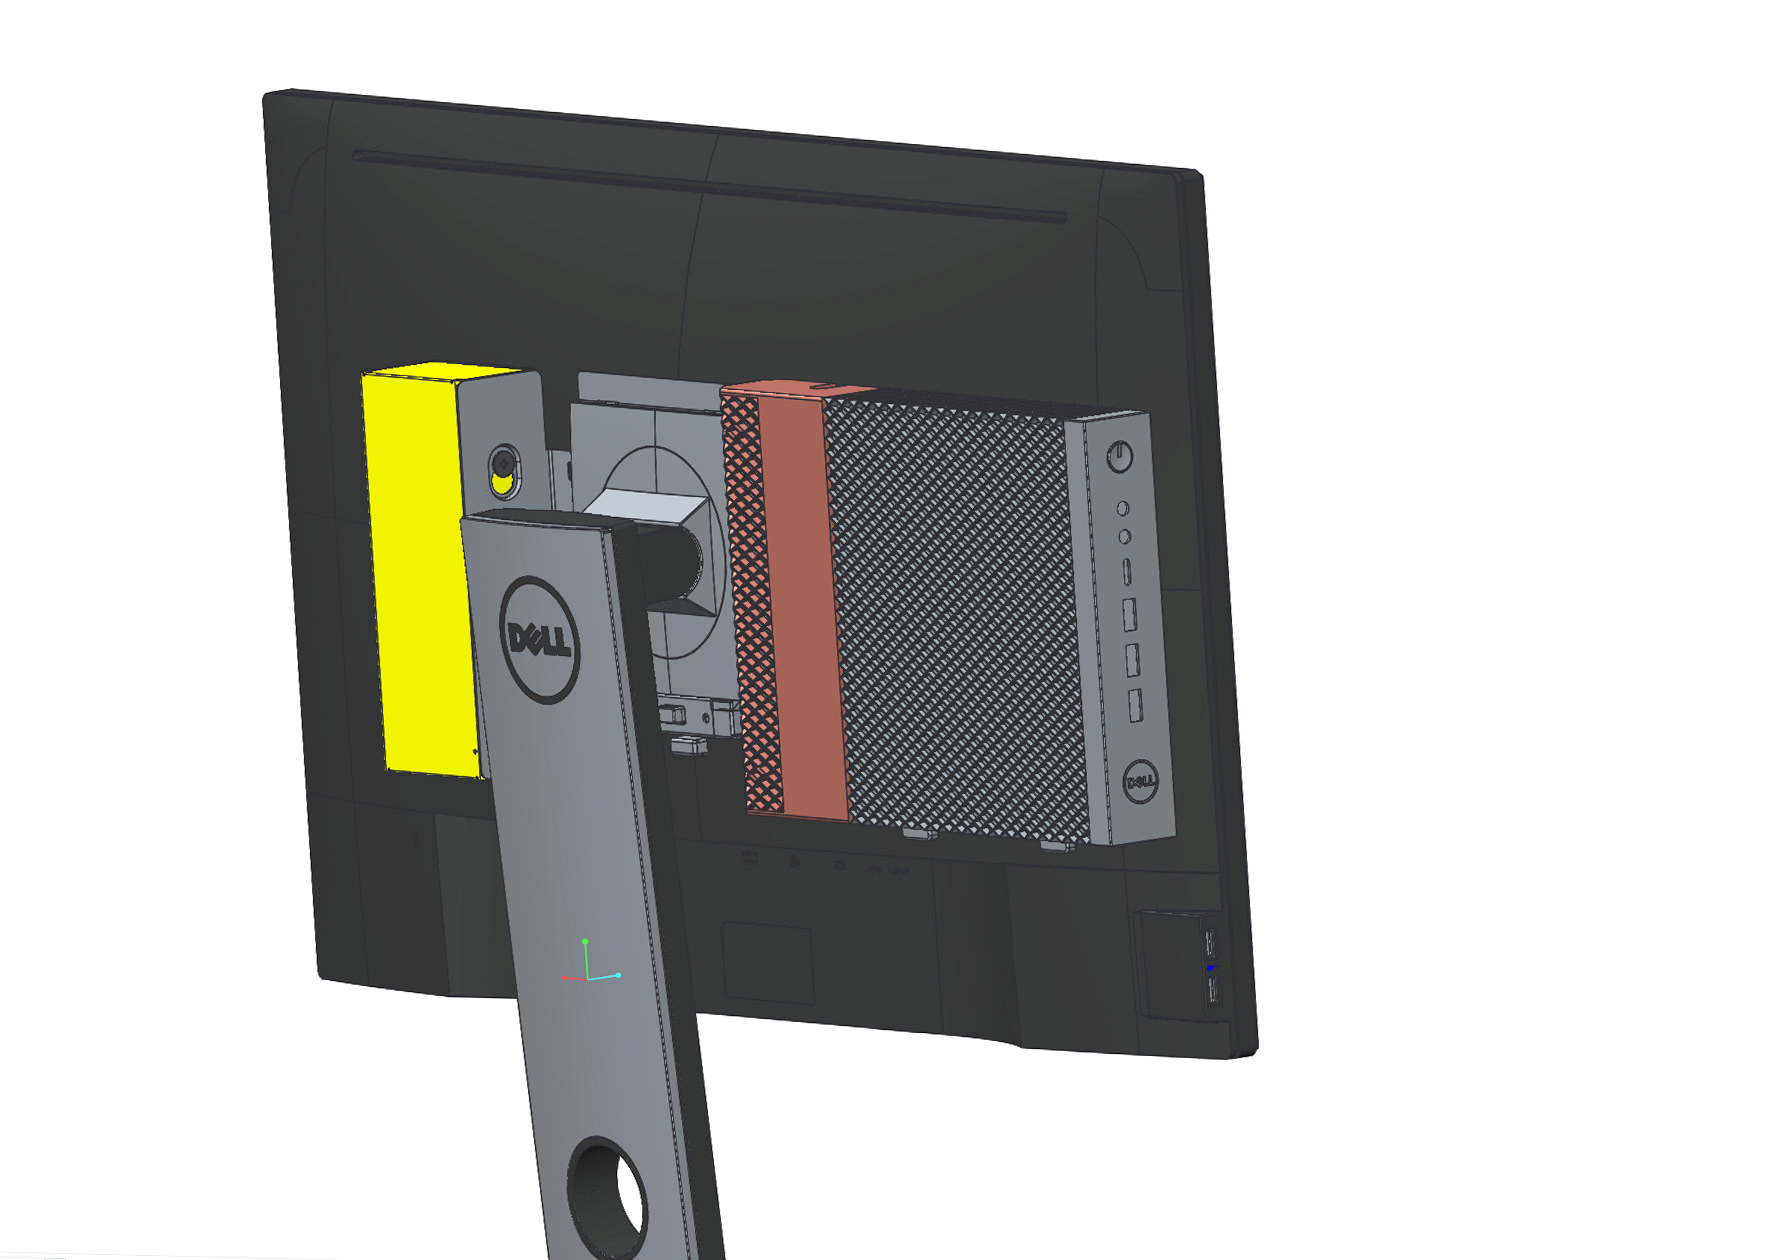
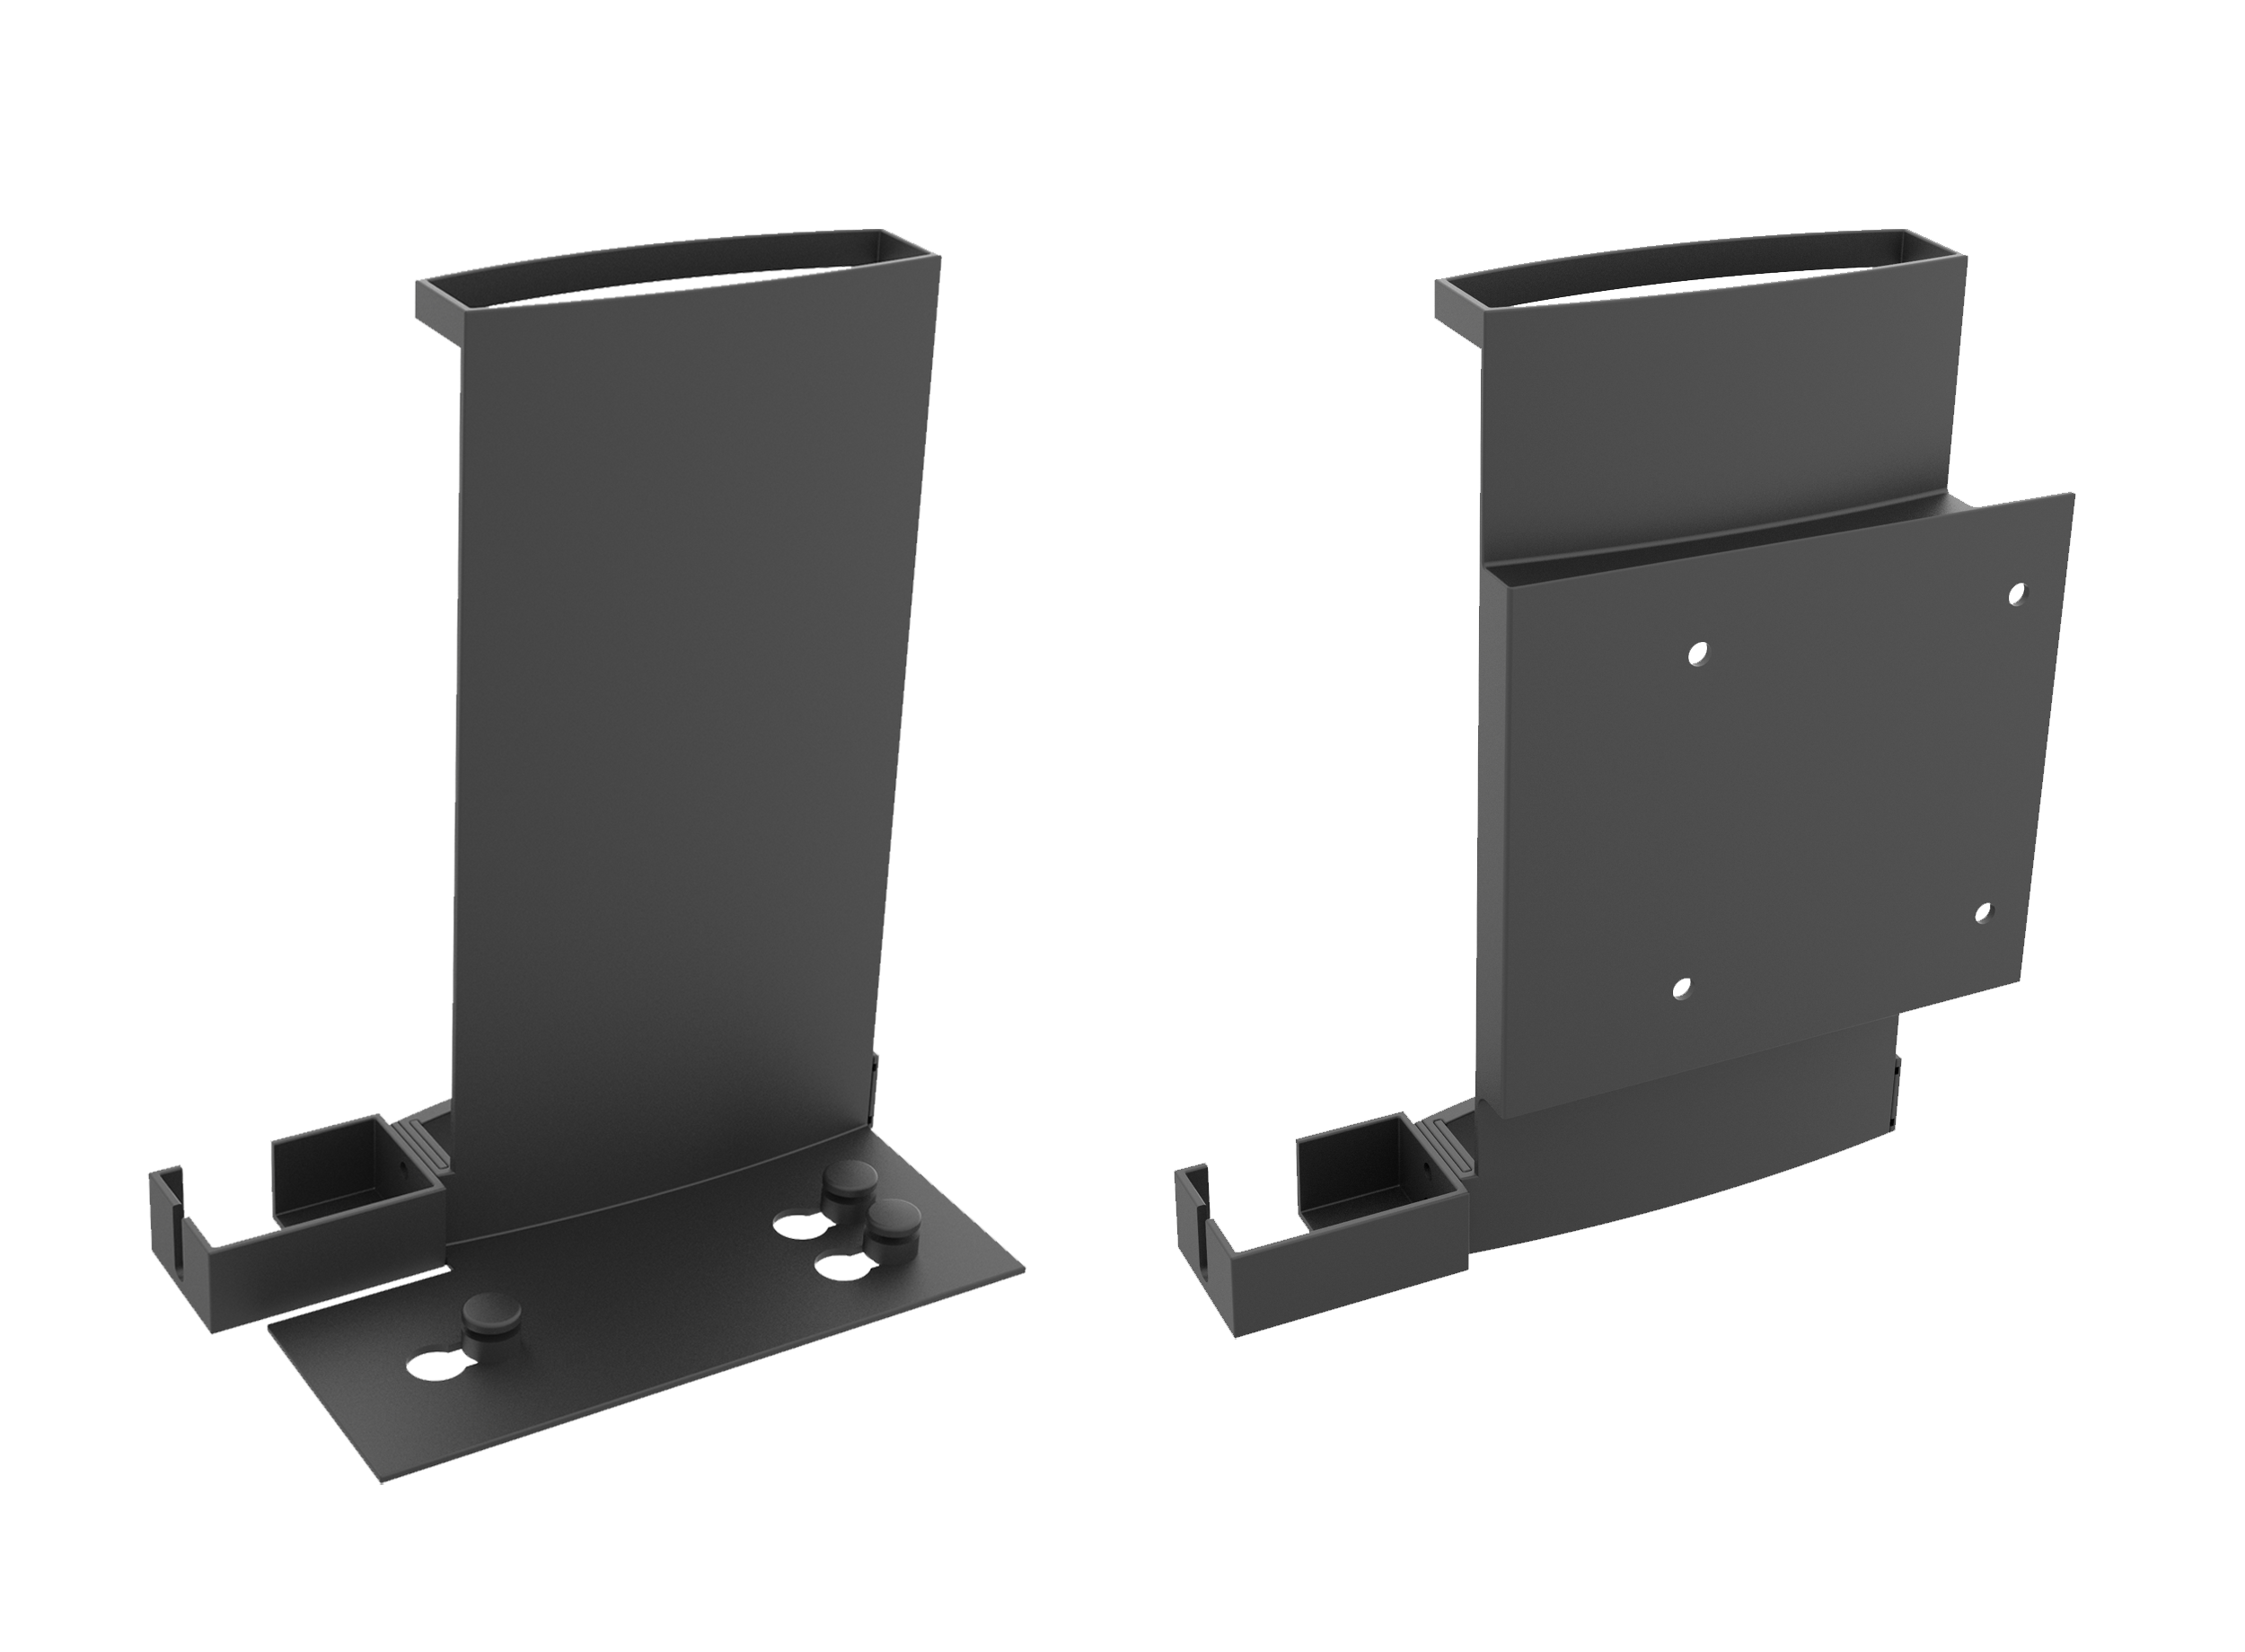
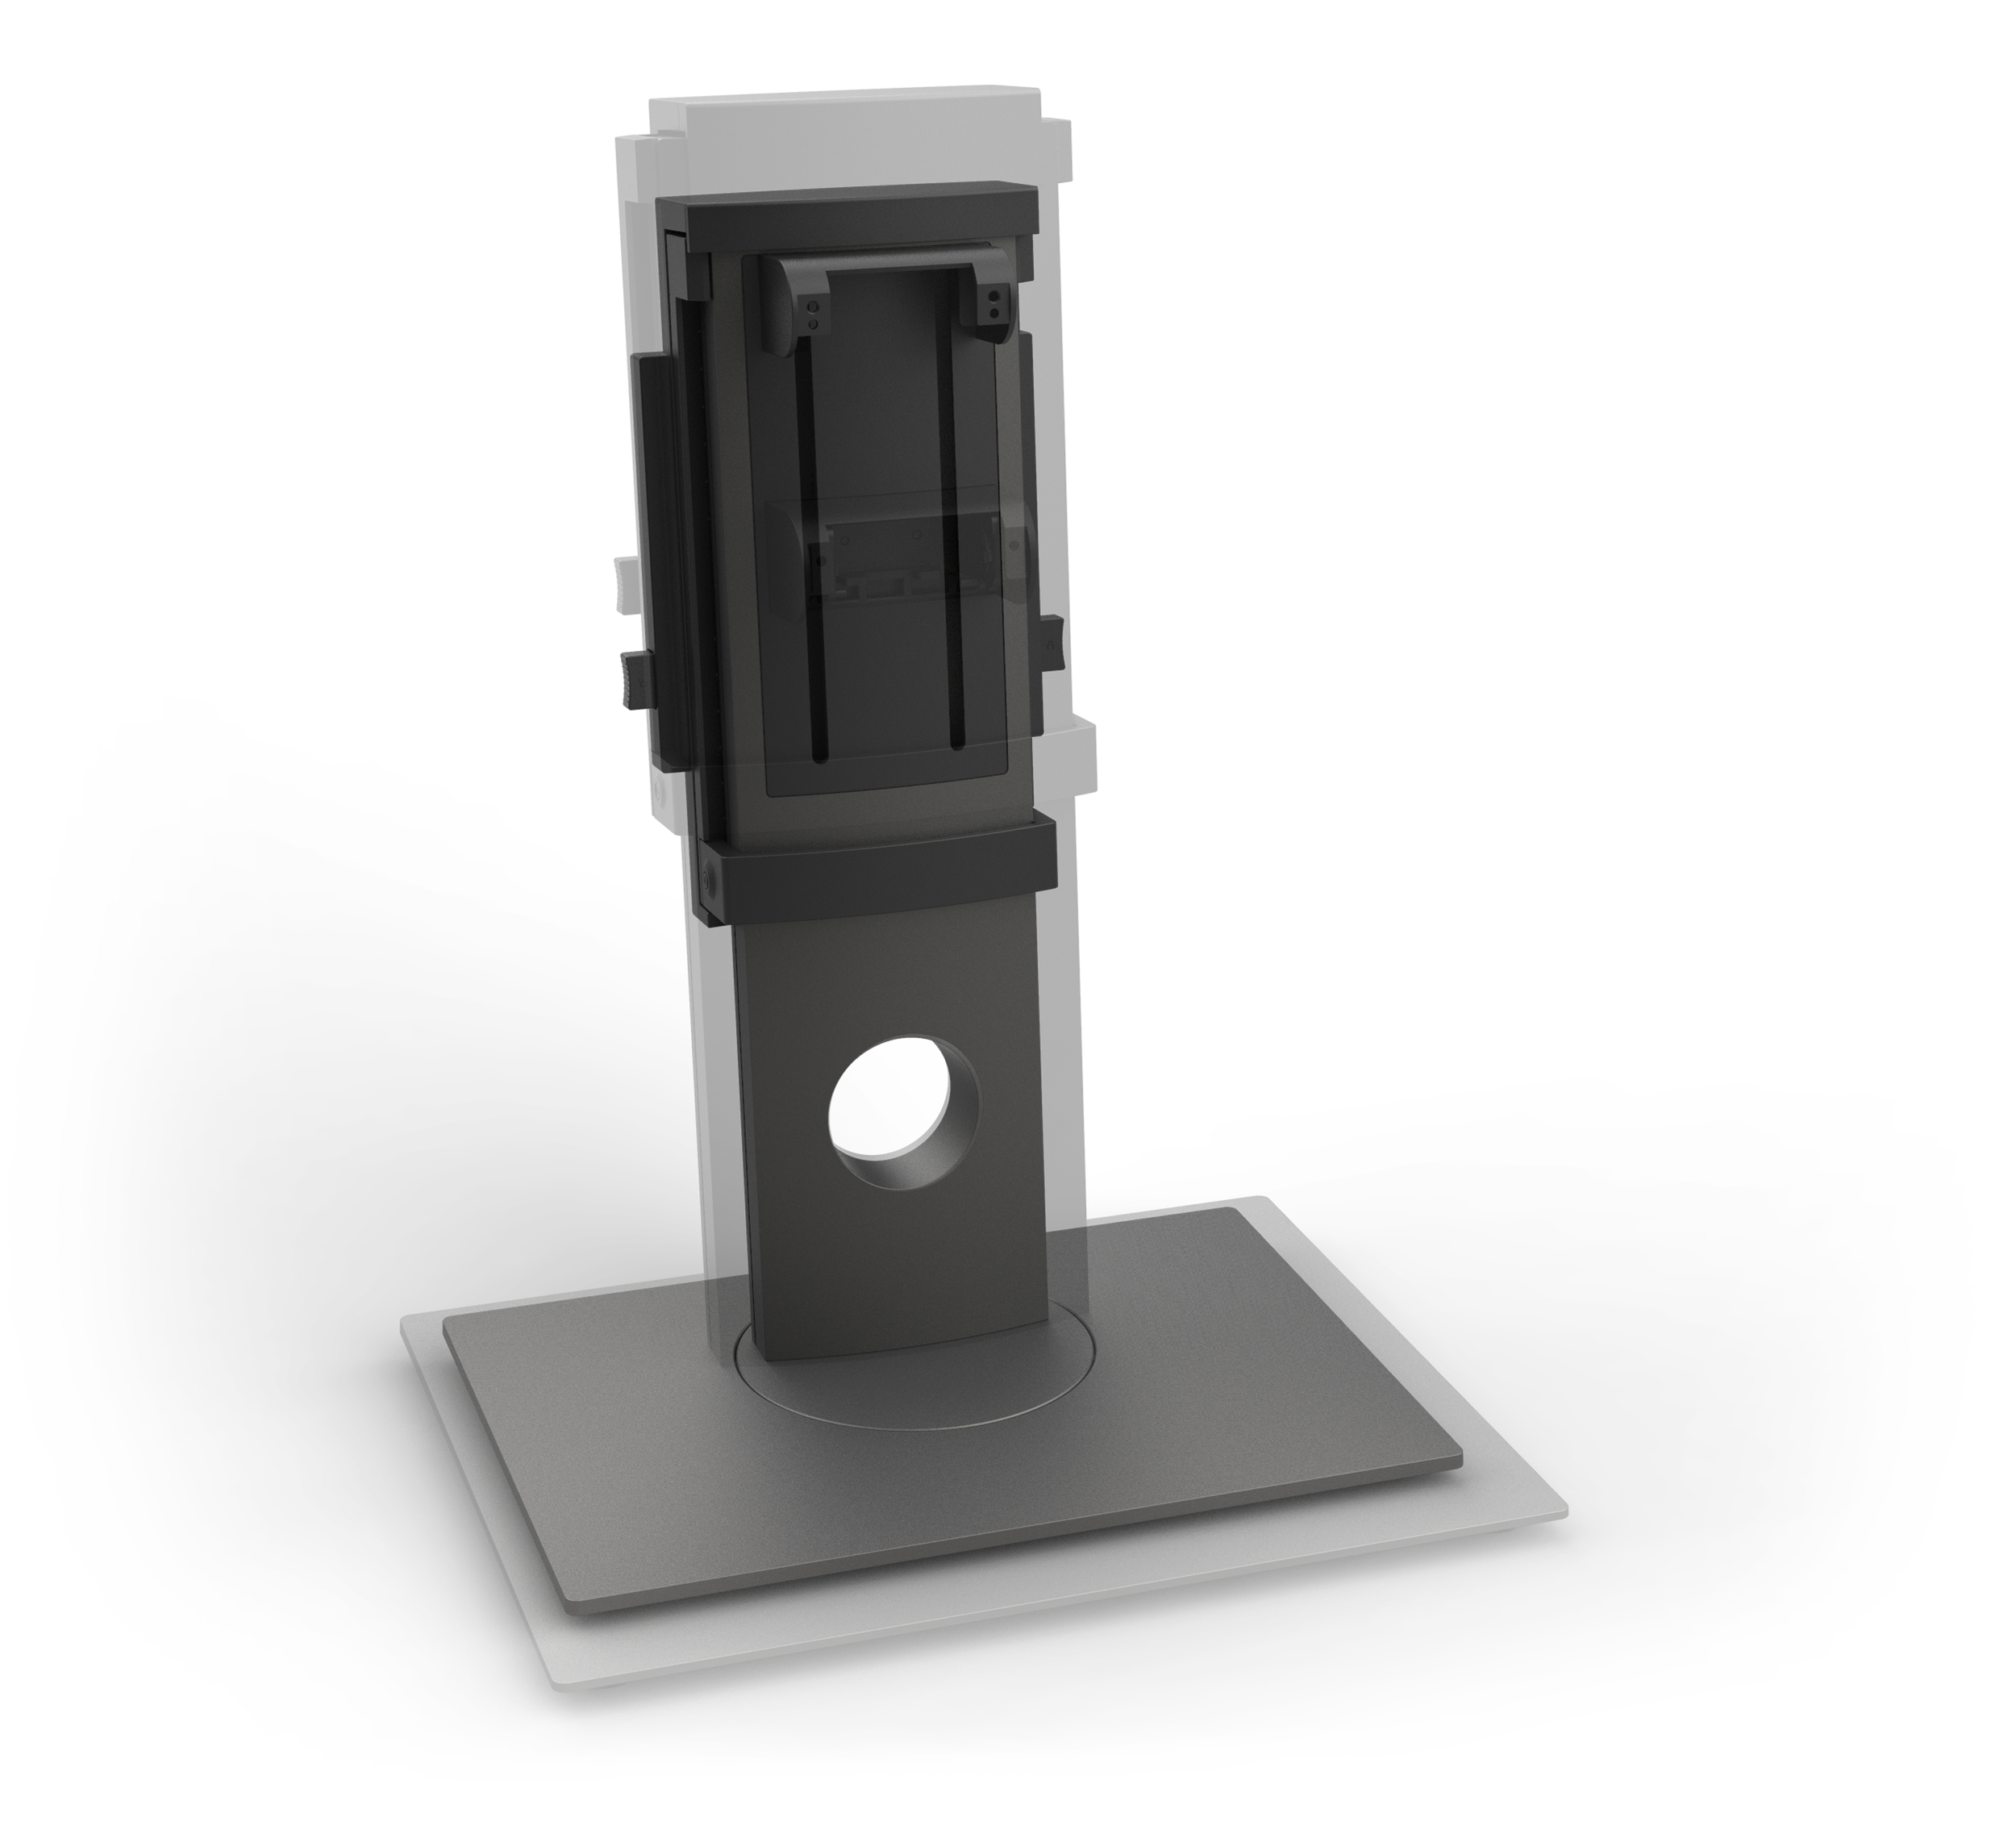
E series mount
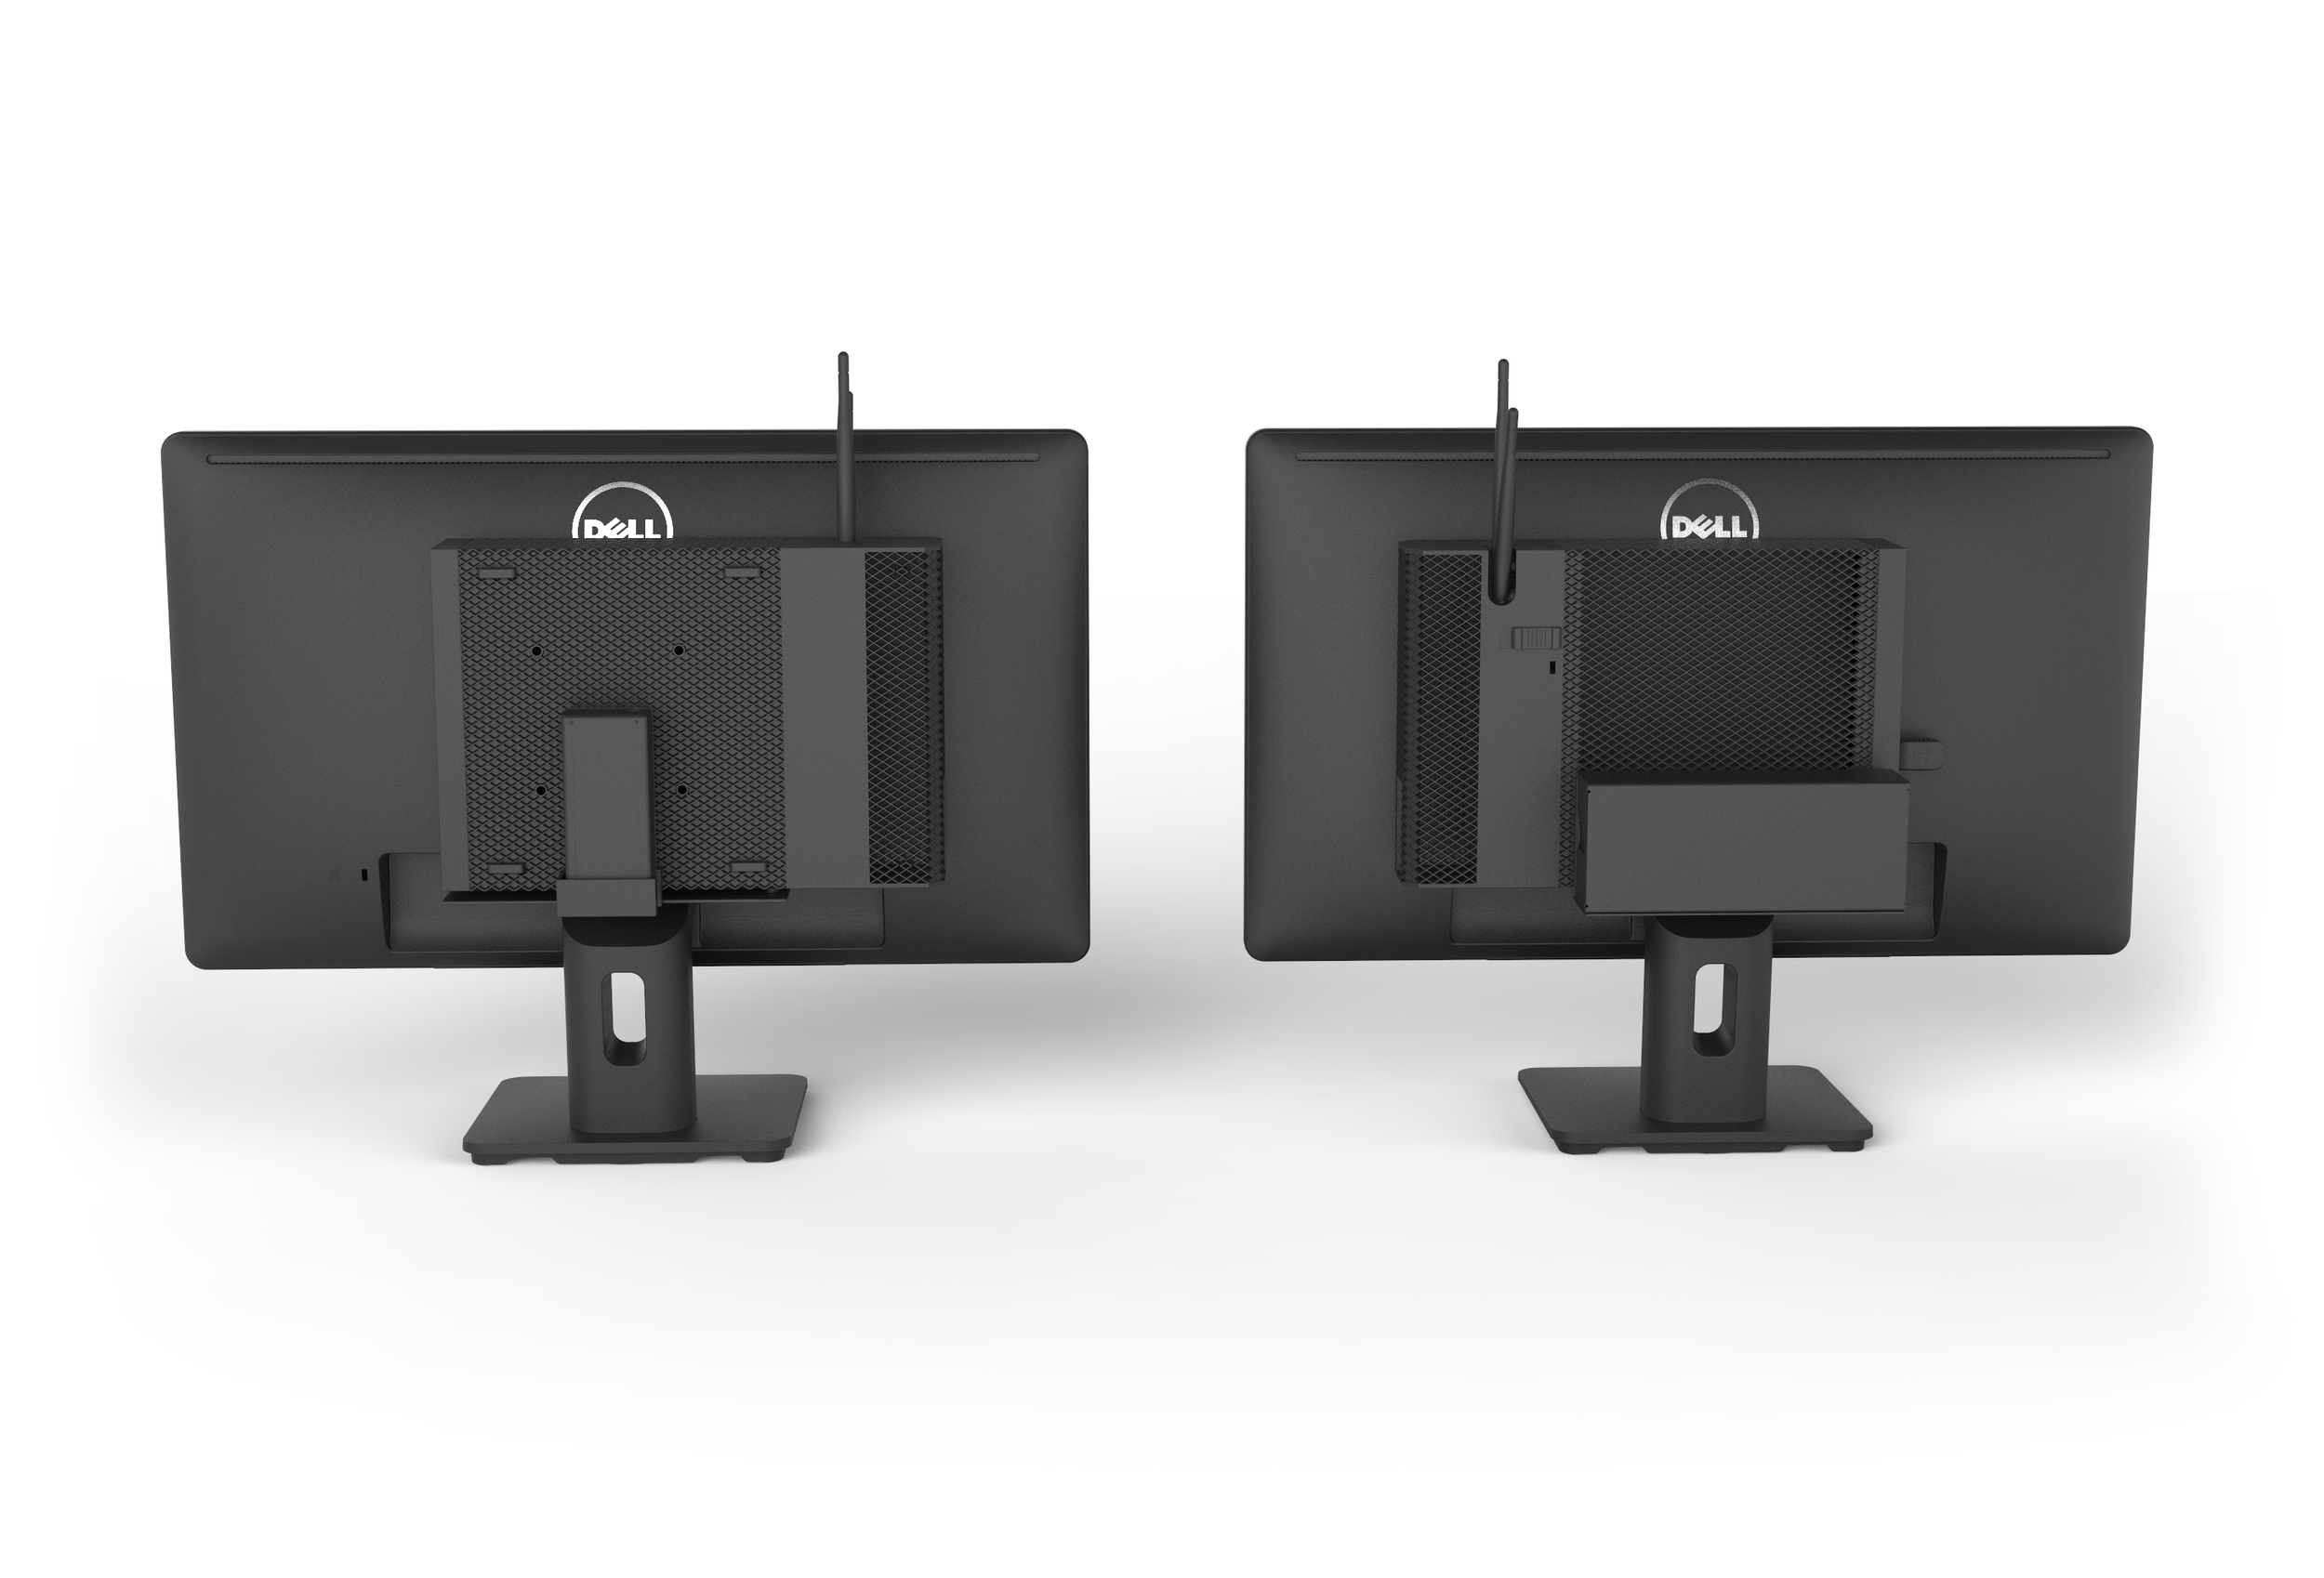
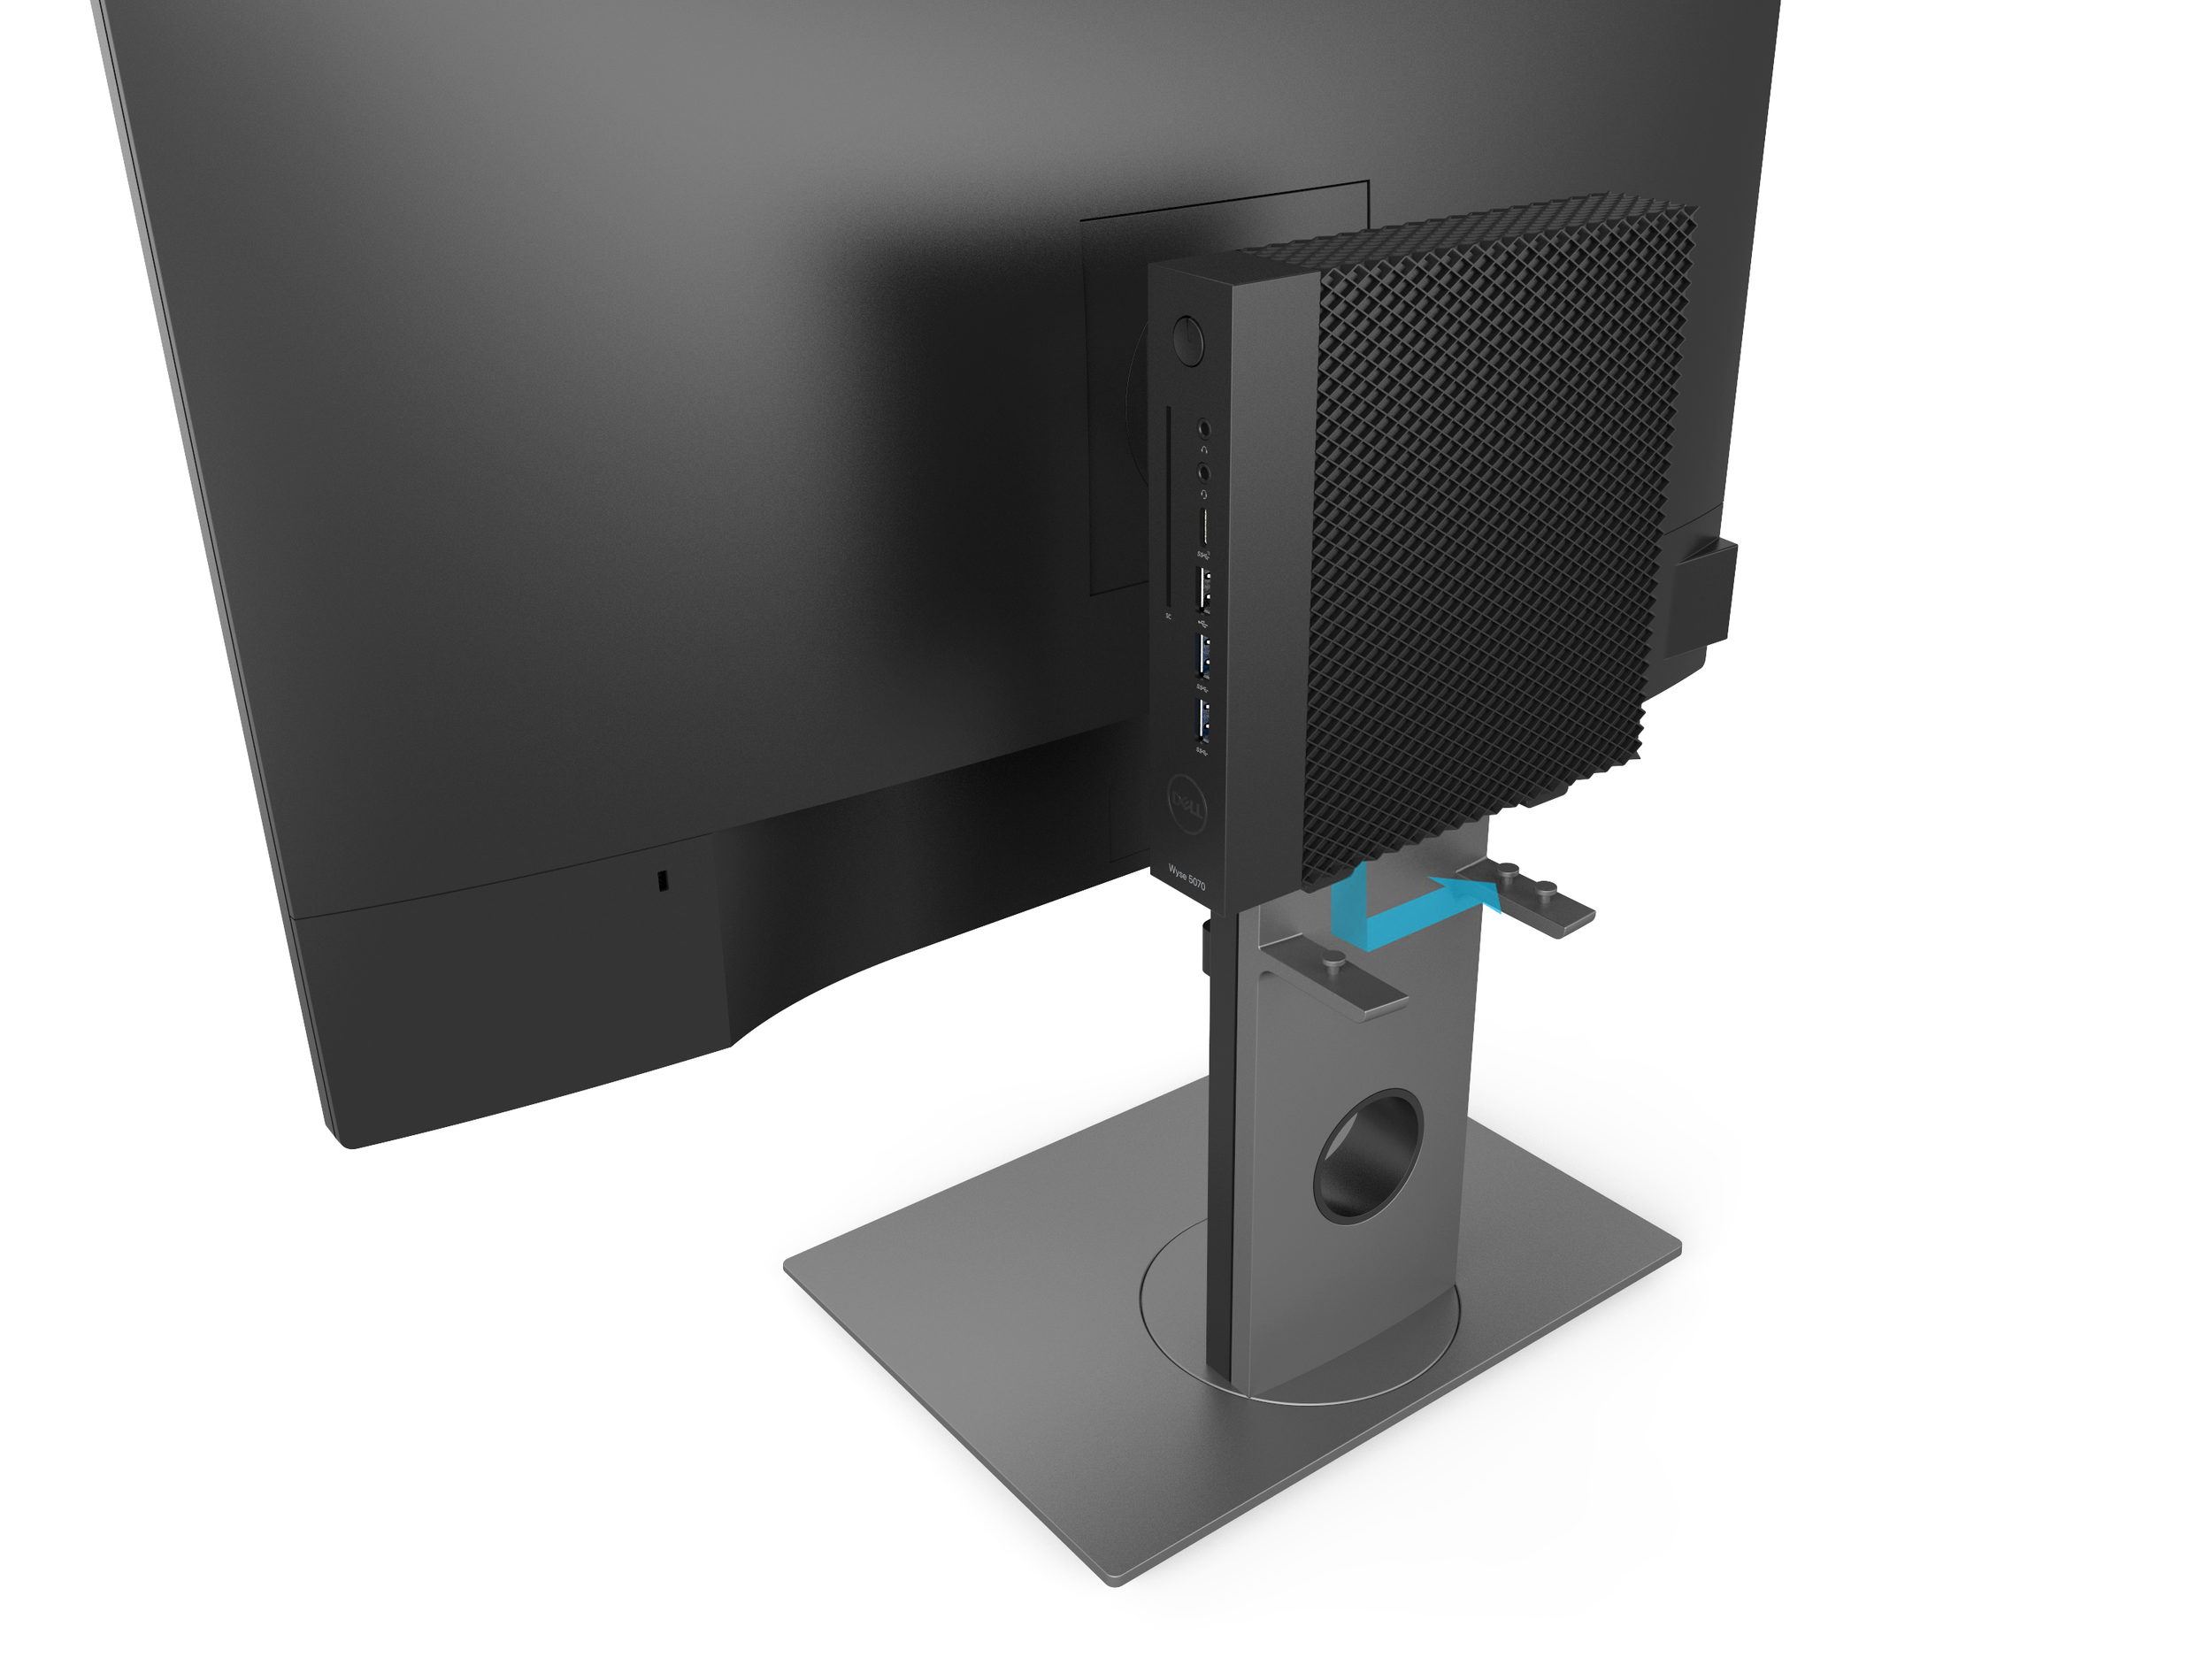
We looked at two solutions at mounting the computer to an E series monitor. The left solution secured the computer on a platform using the bottom keyhole fitting. The right solution utilized standoffs inserted into the VESA holes on the computer.

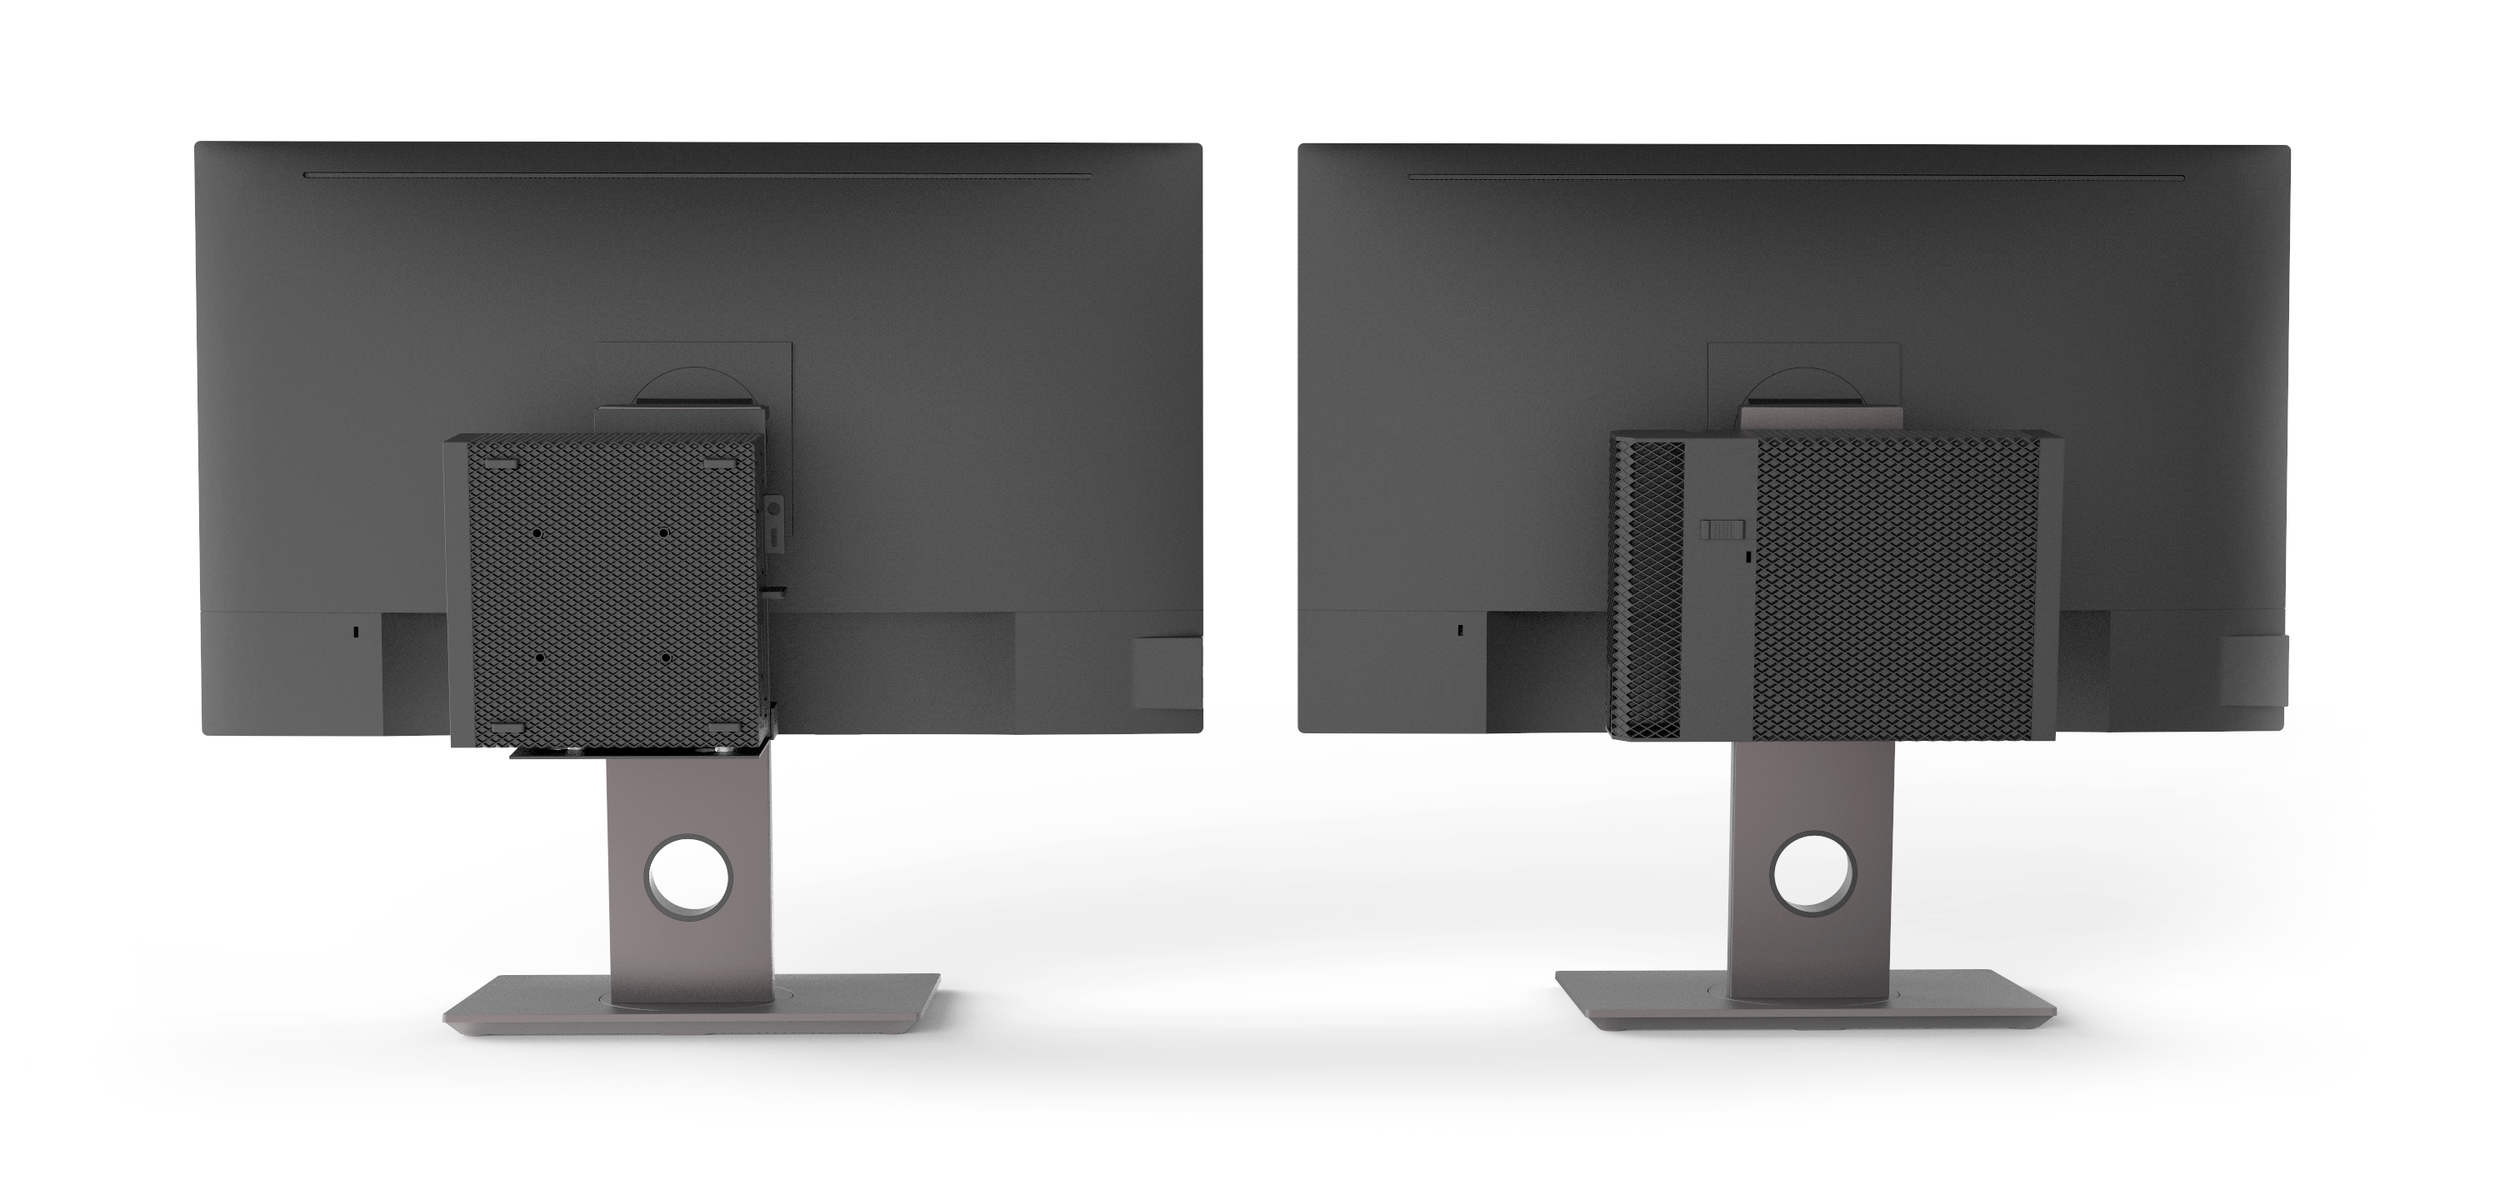
The final solution can accommodate both versions of the Wyse 5070 and a power supply unit box.
The E-series mount screws into the back of the E-series monitor using the 75mm VESA holes and can be locked into place.

Before production we made finalized prototypes, so that we can make sure that everything fits and works properly together.